Overview
The Invoice Interface allows you to upload invoices in bulk using a simple spreadsheet. Follow these steps to create a profile, set up your spreadsheet, and interface the file.
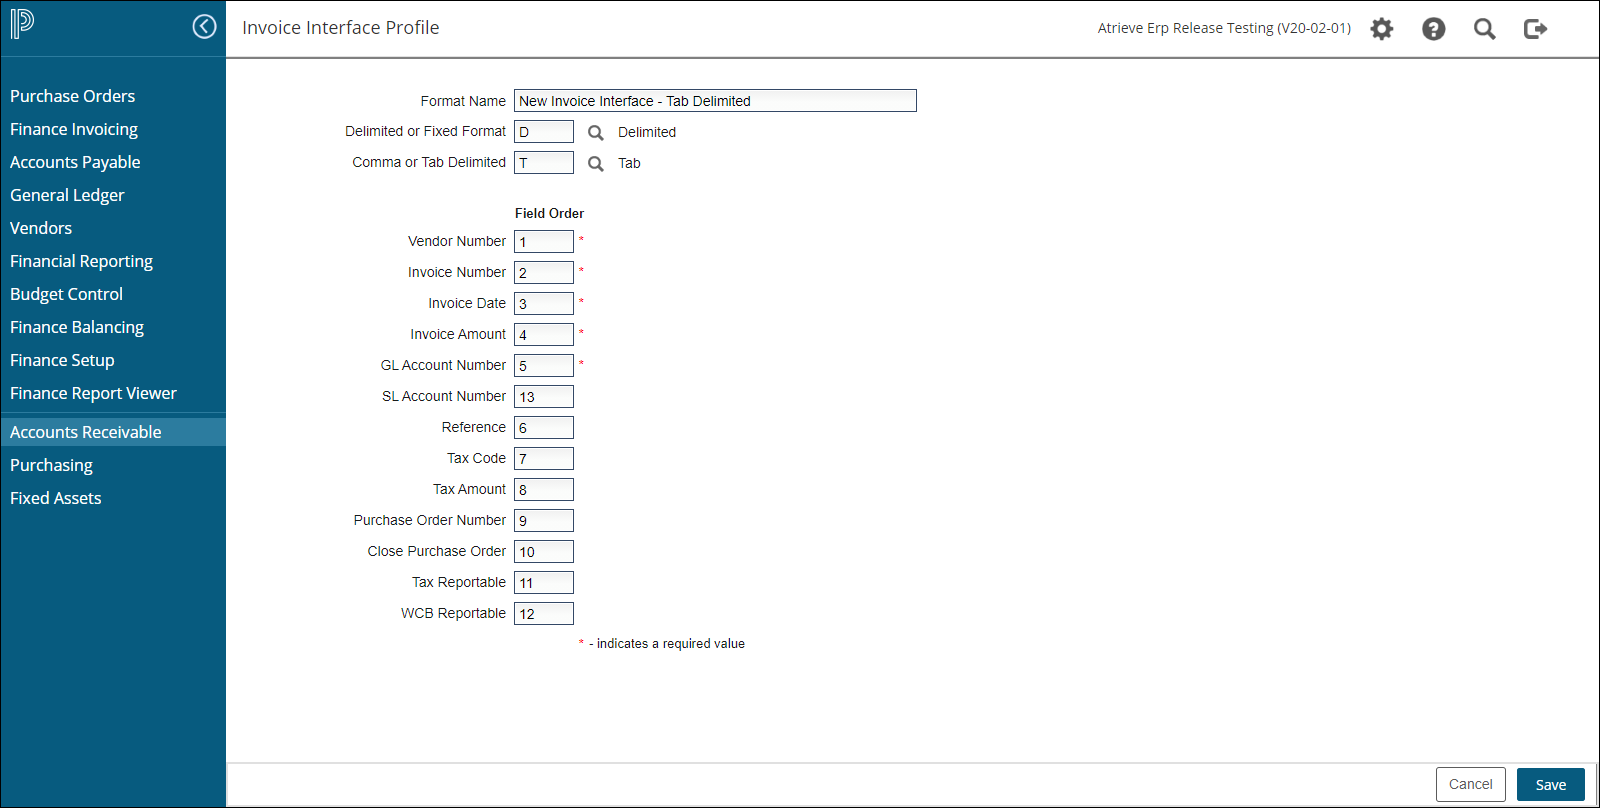
Step 1: Create an Invoice Interface Profile
-
Navigate to: Finance Setup > Interface Setup Menu > Invoice > Add.
-
Set up the following fields:
-
Format Name: Provide a descriptive name for the profile (e.g., "Invoice Import").
-
Delimited/Fixed Format [D/F]: Choose Delimited.
-
Select C for Comma-separated or T for Tab-separated.
-
-
Field Order: Match each field to its column in the spreadsheet:
-
1= Column A,2= Column B, etc.
-
-
Required Fields: The fields marked with an asterisk (*) are mandatory.
-
Step 2: Prepare Your Spreadsheet
-
Set Up the Required Fields:
-
Vendor Number: Must match a valid vendor in your accounting system. Note: For miscellaneous customers, use must use a Fixed Format profile where you can add the address fields.
-
Invoice Number: Must be unique per vendor. Duplicate invoices will be rejected.
-
Invoice Date: Use the format YYYYMMDD (4-digit year, 2-digit month, 2-digit day).
-
Invoice Amount: Enter the total invoice amount, including tax. Use valid numeric strings:
-
Negative amounts: Place a minus sign before the number (e.g., -500.00).
-
Do not include dollar signs or commas.
-
-
GL Account Number: Enter a valid GL account code (max 20 characters).
-
SL Account Code: Enter a valid Subledger (if applicable).
-
Reference: Add a description (max 27 characters).
-
Tax Code: Include a valid tax code if tax applies.
-
Tax Amount: Specify the tax amount.
-
Purchase Order Number: Enter the PO number.
-
Close Purchase Order: Enter Y to close the PO or N to keep it open.
-
Tax Reportable Field: Enter Y if tax is reportable, otherwise N.
-
WCB Reportable: Enter Y if reportable, otherwise N.
-
-
Clean the Data:
-
Remove any headers.
-
Remove $ signs or special characters
-
Format amounts with no commas
-
If you are using CSV remove commas from descriptions
-
-
Save the File:
-
File Type: Save as Text (Tab-Delimited) or CSV, based on your profile setup.
-
Use a simple file name without spaces or special characters. Example has no credits and Example B does have credits.
-
Step 3: Import the File
-
Navigate to: Finance Balancing > Interfaces > Invoice.
-
Upload the File:
-
Select your profile.
-
Enter the period for the expenses to appear.
-
Choose the Batch Type.
-
Use the File Upload button to select and upload your file.
-
-
Run in Preliminary Mode:
-
Review for errors:
-
Fix errors in your spreadsheet or profile.
-
Re-run until there are no errors.
-
-
-
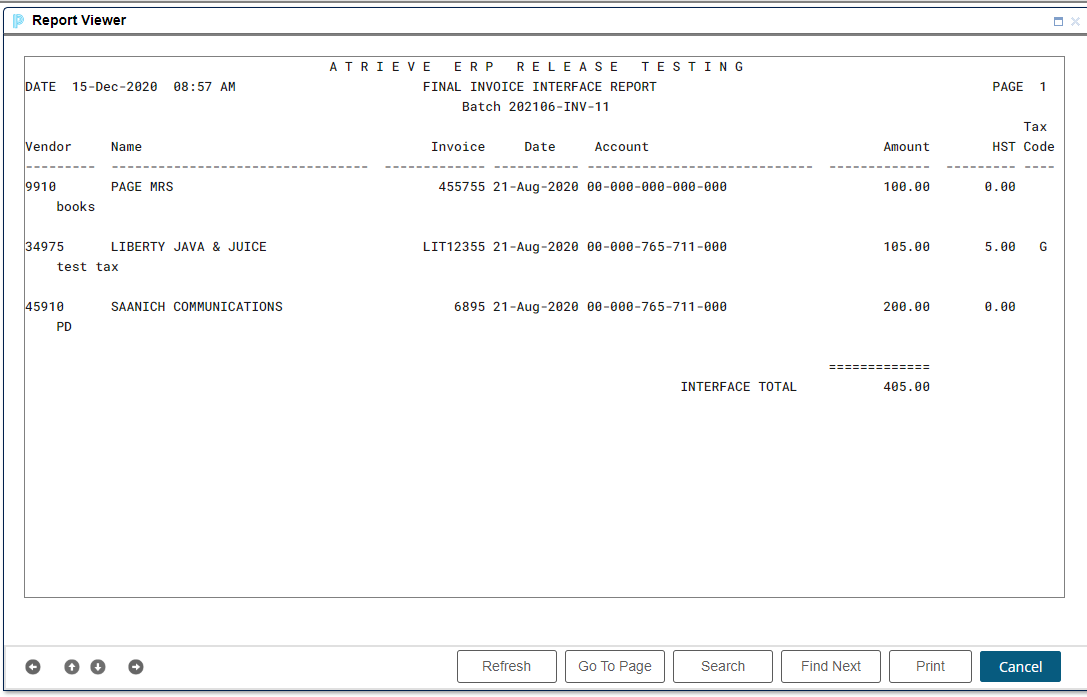
Run in Final Mode:
-
Once error-free, run as Final to complete the import.
-
Tips & Best Practices
-
Error Logs: Use the preliminary report to identify and fix errors. Check the Finance Report Viewer for detailed logs.
-
Unique Invoice Numbers: Ensure invoice numbers are not duplicated to avoid rejection.
-
File Format: Always save in the correct format (Tab-Delimited or CSV) as per your profile.
. Final report example