
User Guide
Entering an Invoice
This section will show you how to enter an invoice in the system. We will take you through each screen and explain how to enter the required information.
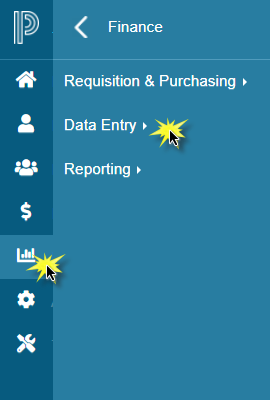
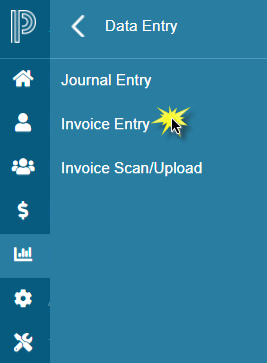
To begin, click on Finance > Data Entry > Invoice Entry
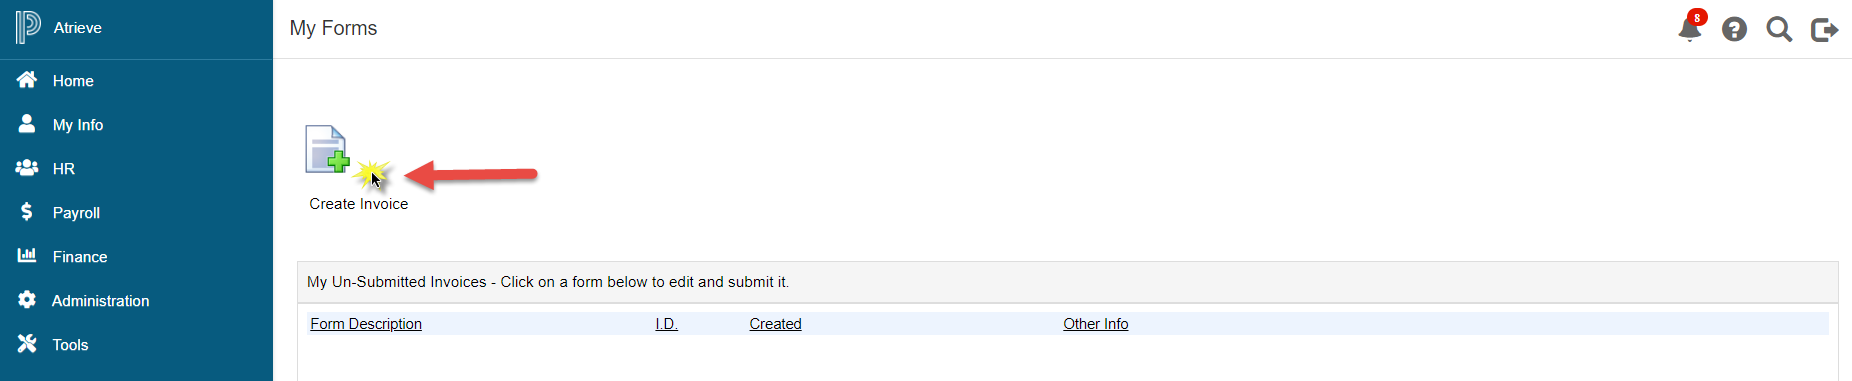
The first screen of the Invoice Entry Web allows you to create new invoices, inquire on the status of your invoices, and view processed invoices with backup information submitted for your location. Further information on reports and finding invoice backup can be found in the Invoice Inquiry section.
To start the invoice creation process click on the 'Create Invoice' button.
The following invoice entry screen allows you to enter the invoice details and GL coding and to attach the scanned copy of the invoice. Detailed instructions are provided for each field below.
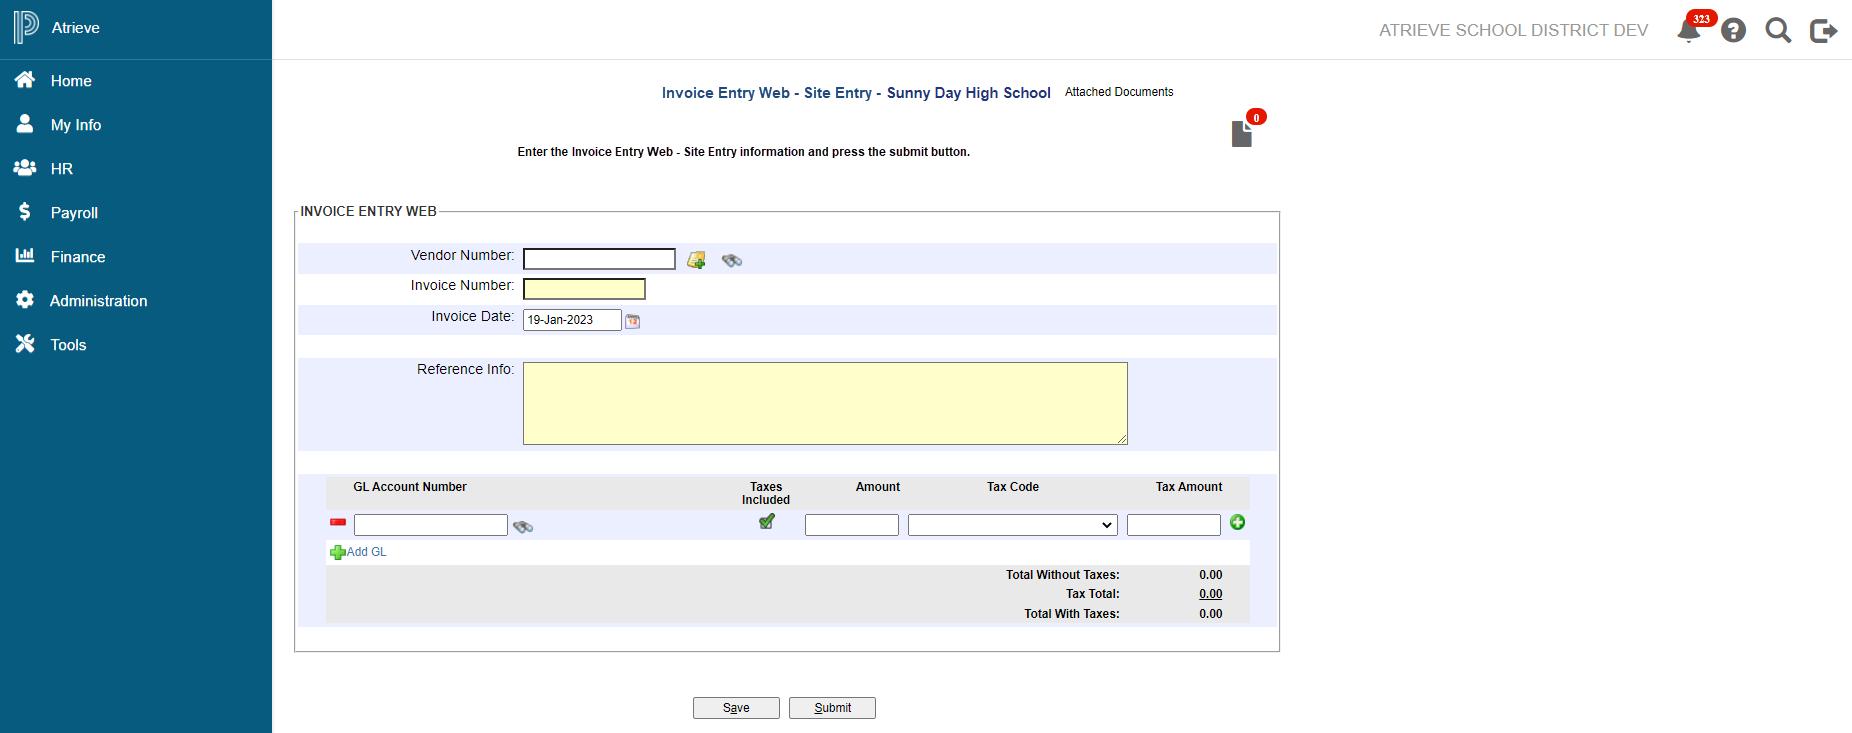
Vendor Number
To complete the vendor number field:
-
Enter the vendor number if known. Otherwise, click on the icon to load the vendor search screen.
-
Enter the vendor name (or a specific part of the name) with a * before and after the name and click on ‘Search’. (Example: If you are searching for the vendor Tree House Press Inc. – then type *house* which will search for every vendor containing *house*).
-
Select the vendor in the list that comes up. If the vendor does not appear, please contact Accounts Payable to create the vendor.
+ Invoice Number
Enter the invoice number that is on the invoice. Please note the green checkmark or red X that appears to the right of the invoice number field. A red X denotes that the invoice is already in the system and this may be a duplicate you are trying to enter.
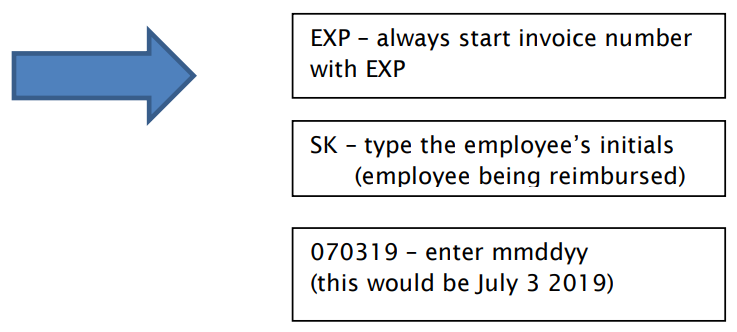
For invoices that are payable to an employee, please use the following: EXPSK070319
Invoice Date
Enter the date that is on the invoice either manually in the DD-MMM-YYYY format or by picking the date using the icon.
Reference Info
Enter a comment about the invoice if required. Note that the reference information you enter will appear on the cheque stub sent to the vendor.
GL Entry/Coding
GL Account Number
Enter the GL account you would like to code the invoice to using no dashes. If you like, you can use the binocular icon to perform a search to find the GL account you want to use.

Please note the green checkmark or red X that appears when you enter the GL account. Any invalid GL accounts will stop the form from being processed. Please contact Accounts Payable to set up new GL accounts.
Amount
Enter the amount of the invoice that will be coded to the GL account you entered.
Tax Code
The tax code will auto default to the appropriate tax code required for the account entered. If nothing is
selected, please choose GST - 68% Rebateable.
Tax Amount
Let the system calculate the GST
To split the invoice between many GL accounts, click on Add GL and repeat the above steps.
Note: Ensure that the Total with Taxes at the bottom matches the total on the invoice.
Attach Invoice Back-up
To attach the electronic or scanned backup for the invoice you are submitting, click the icon in the top right corner of the form.

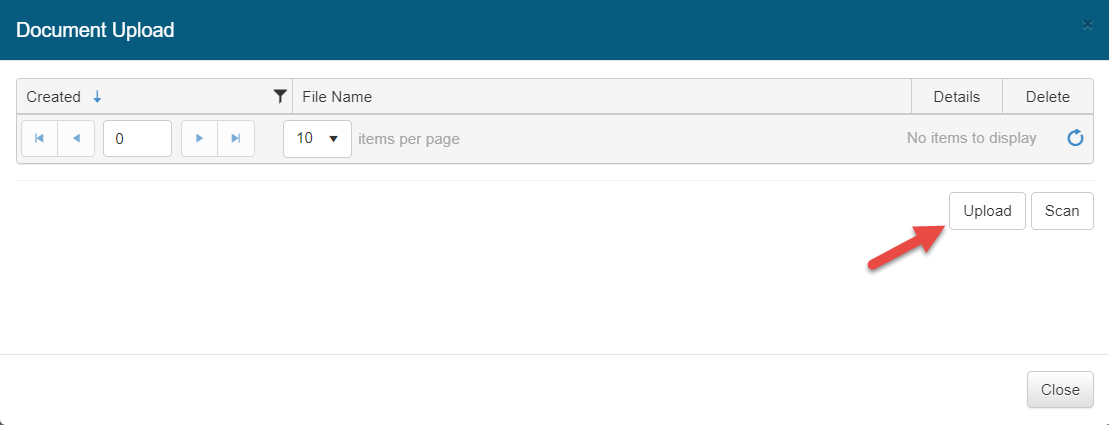
Upload Document
Step 1 – Select Upload button
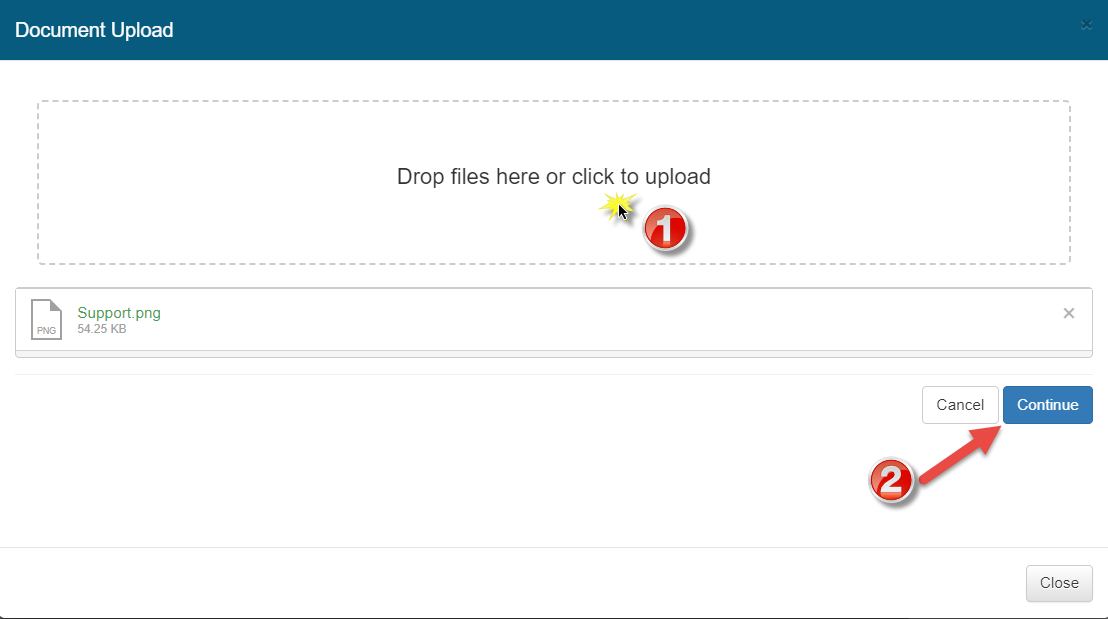
Step 2 – Click within the dot framed box and Browse your C: or network folder and select the pre-scanned document, ensure document loads and select continue
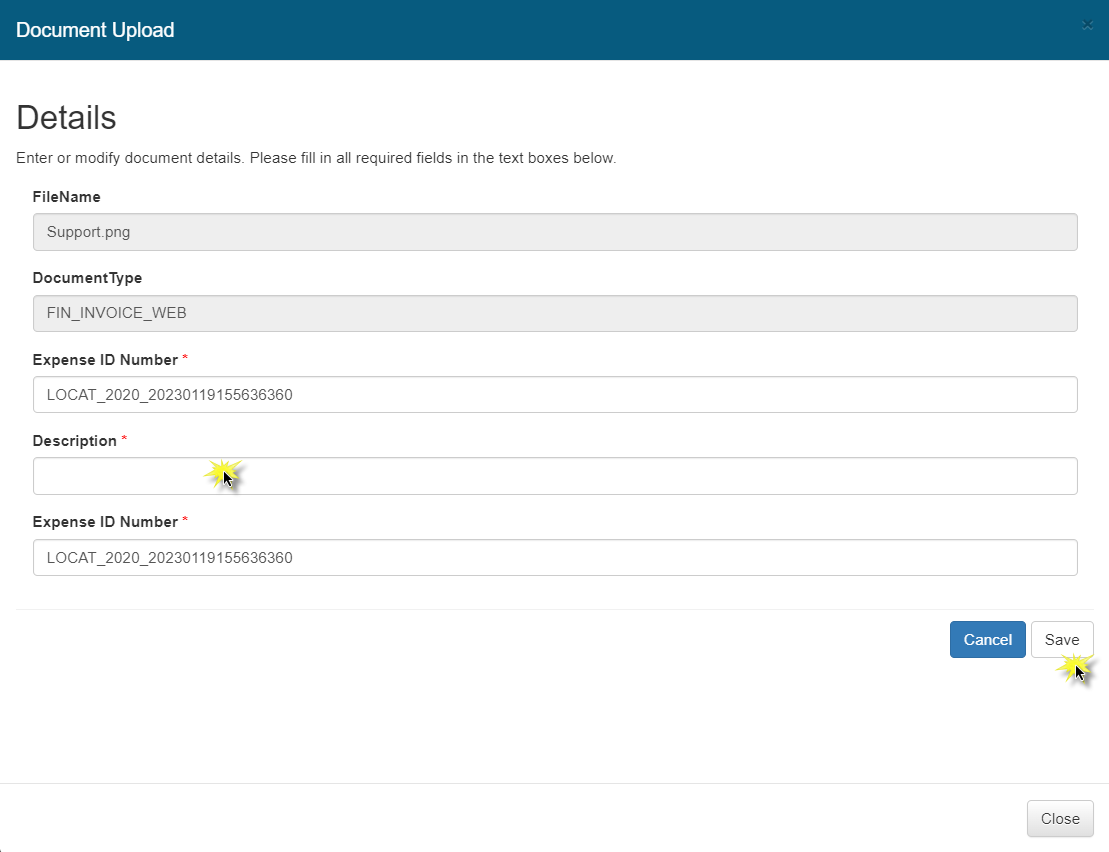
Step 3 – Enter any required meta data fields, for example, Description, and select save
Save or Submit for Payment
If you would like to save the form for completion at a later time, click on save.
Once the entire backup has been loaded and the form entry is complete, click on the submit button. Submitted invoices will be routed to the site authorizer, then to accounts payable for processing.
Invoice Entry Home Screen
This screen in IEW provides the ability to track and view started/submitted invoices.
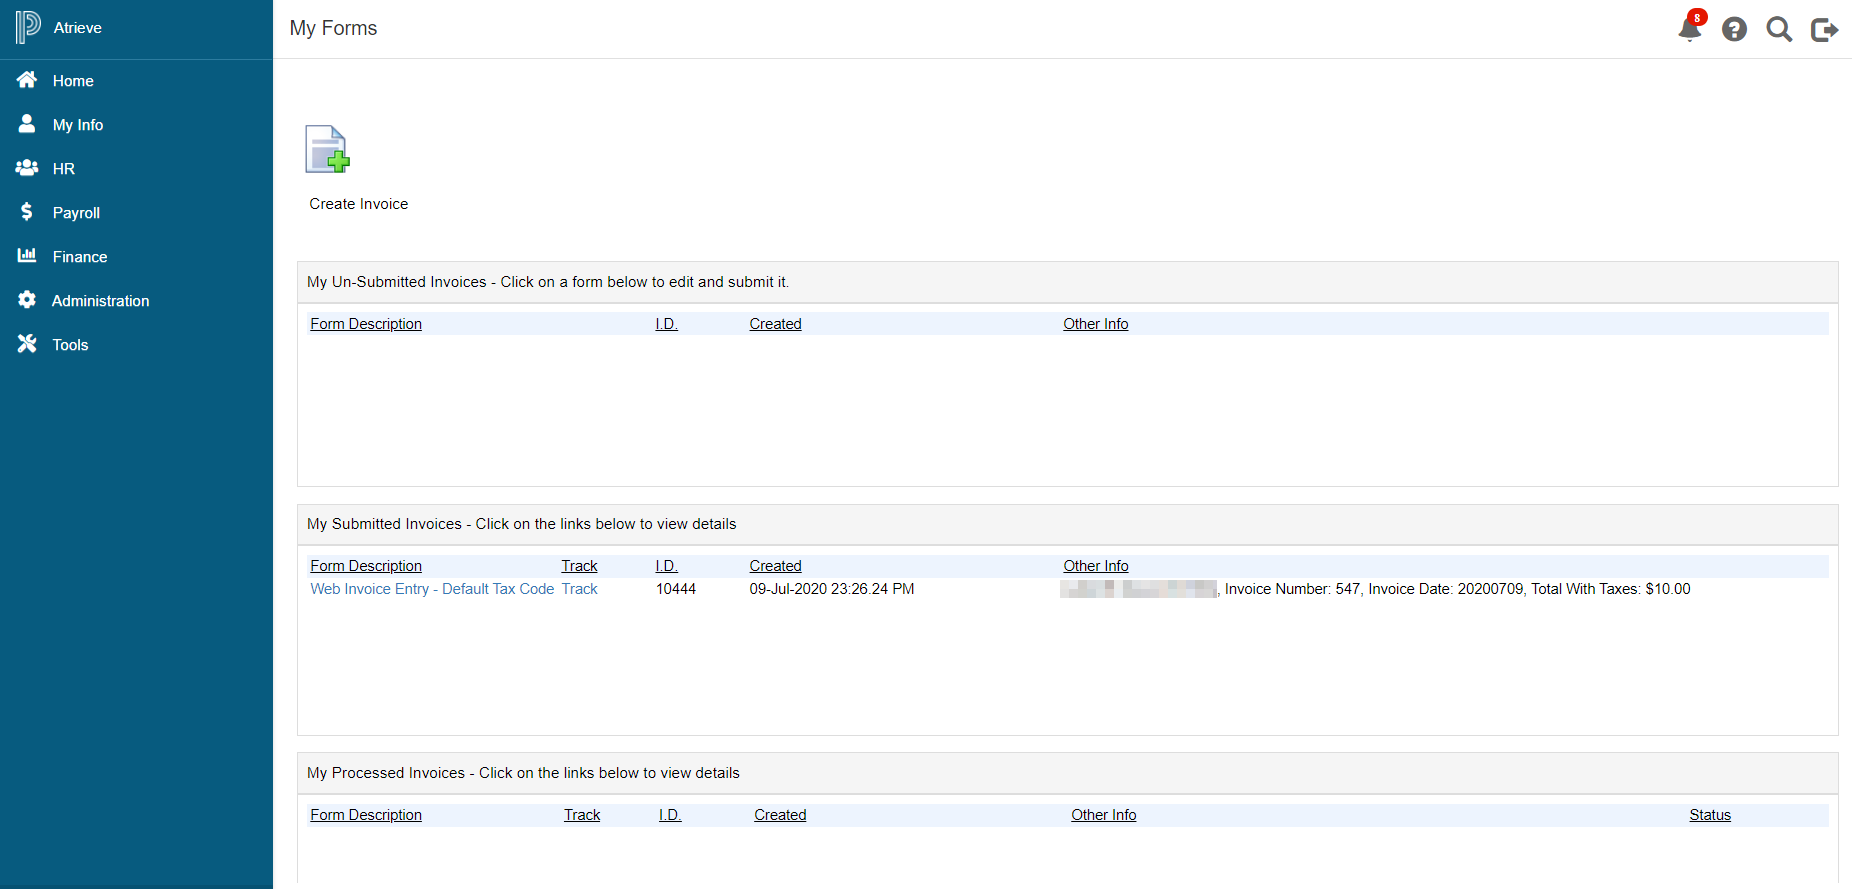
My Un-submitted Invoices
This report will provide you with all of the reports you have saved and not yet submitted for payment. Click on the web invoice link to go into the form to complete it.
My Submitted Invoices
This report will provide you with all of the reports you have submitted for payment but have not yet been processed for payment. Click on the web invoice link to go into the form or click on the track link to view the routing status.
My Processed Invoices
This report will provide you with all of the reports you have submitted for payment and that have been processed for payment. At any time, you can look through the invoices and access the form and backup.