
Overview
The Vendor Interface module allows you to upload vendor information from a spreadsheet. Follow these steps to create a profile, set up your spreadsheet, and interface the file.
Step 1: Create a Vendor Interface Profile
-
Determine if you are you using City, Province and Country Code
-
Navigate to: Finance Setup > Profiles > User Profile > Page 3.
-
Activate City, Prov, Country on Vendor (If activated, you’ll use City, Province, and Country fields instead of Address lines 2, 3, and 4. in the profile)
-
Set Up the Vendor Profile:
-
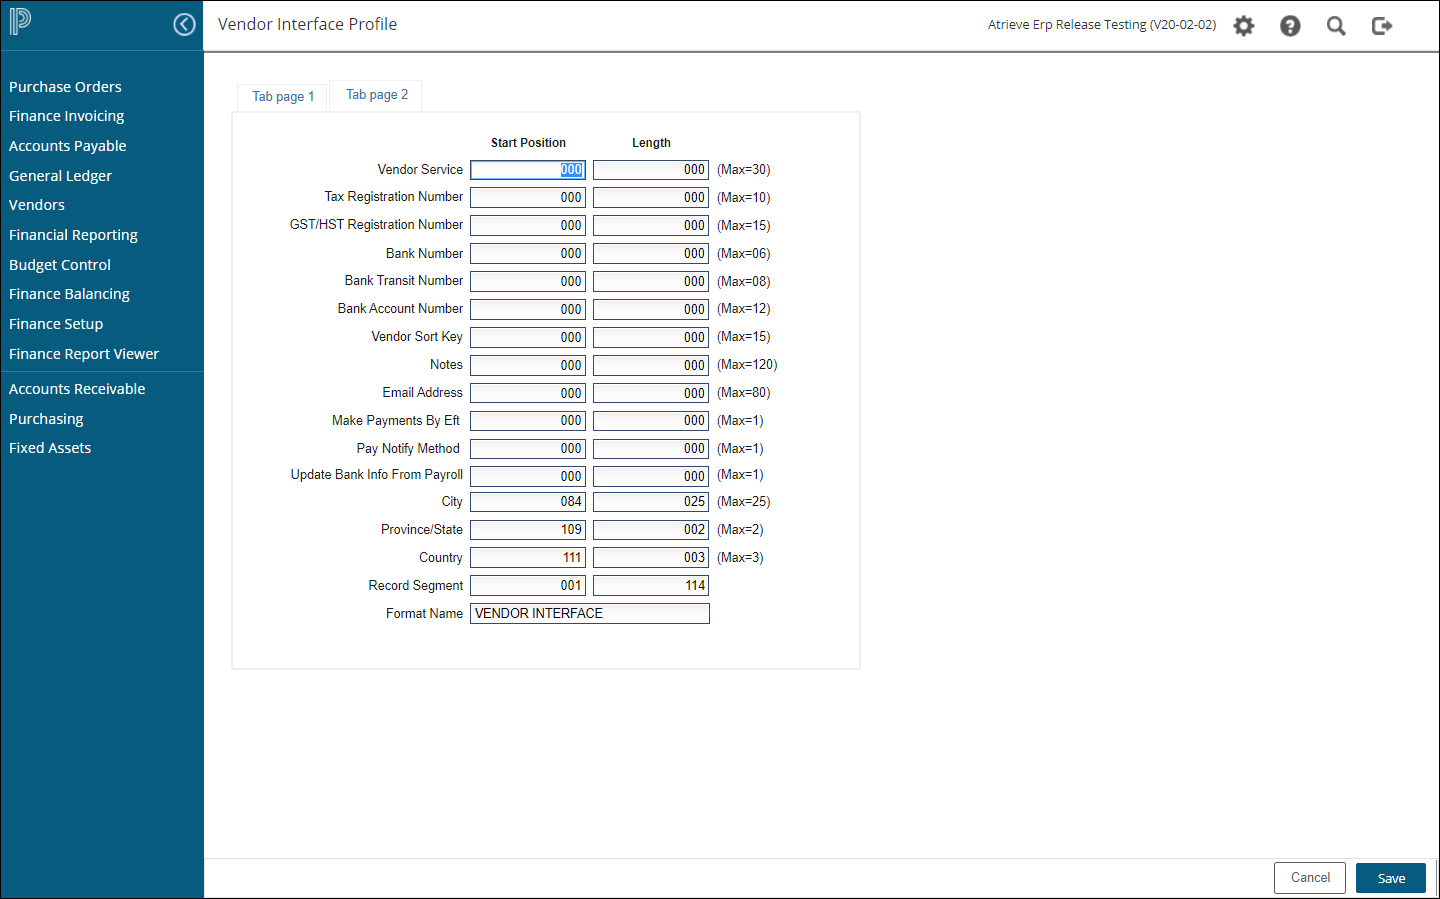
Go to: Set up and Maintenance > Interface Set up Menu > Vendor Additions.
-
Define the required fields:
-
Start Position: Enter the starting position in the input file for each field (e.g., 001 for the first field).
-
Length: Enter the field length. Ensure this doesn’t exceed the maximum length for that field.
-
-
Fill out the Record Segment: on the second page.
-
Starting position is 001.
-
Ending position is the total length of all defined fields.
-
-
Tips:
-
Only updating the vendor name? Define just Vendor Number, Vendor Name, Province, Country, and Record Segment.
-

Step 2: Prepare Your Spreadsheet
-
Set Up Columns:
-
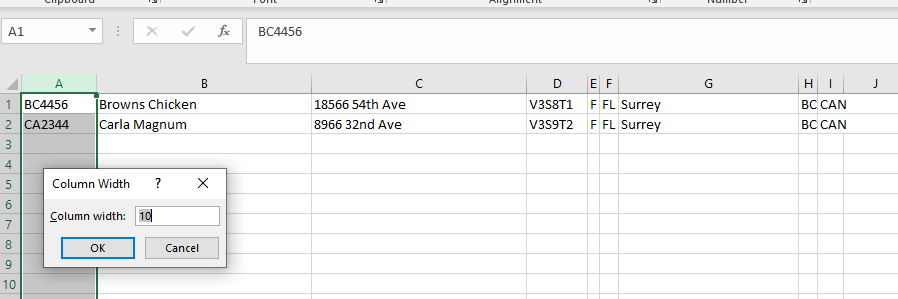
Ensure the spreadsheet matches your profile.
-
Left-justify all data in the columns.
-
-
Adjust Column Widths:
-
Right-click on each column and adjust the width to match the Length defined in your profile:
-
Example: Column A (Vendor Number) = Width 10, Column B (Vendor Name) = Width 30, etc.
-
-
-
Save the File:
-
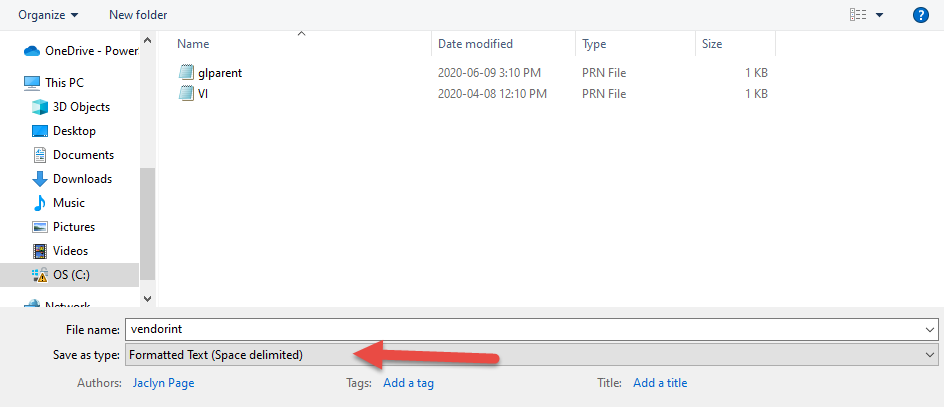
Save the spreadsheet as Formatted Text (Space Delimited).
-
Step 3: Import the Vendor File
-
Go to: Finance Balancing > Interface > Vendor Interface.
-
Upload the File:
-
Select the new vendor file you created.
-
Click the Upload button to upload the file from your computer.
-
-
Preliminary Run:
-
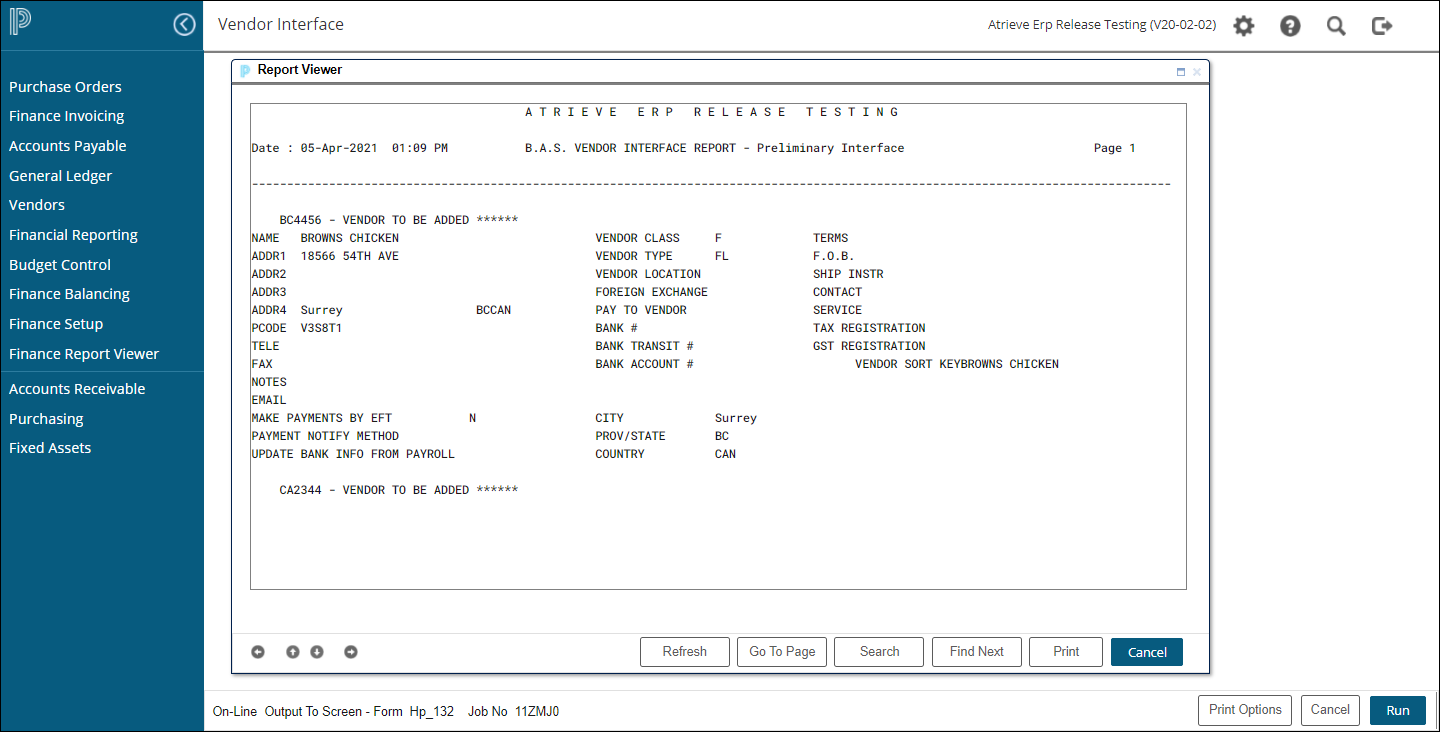
Run the interface in Preliminary Mode to check for errors.
-
Review the report:
-
New vendors will be marked as Added.
-
Updated vendors will be marked as Updated.
-
-
Fix errors in your spreadsheet or profile and re-run until error-free.
-
-
Final Run:
-
Once everything looks correct, run the interface in Final Mode.
-
The file will say added if its new and updated if its been changed.
Vendor File
-
The Vendor File interface module provides the ability to interface Vendors into Atrieve. The input file may have been created using either a report output from another system or from the Excel. The file must be saved as Formatted Text (space delimited).prn
-
The interface format for the vendor file looks like this:
-
Each field requires the entry of a start position and the length of field found in the external file to be interfaced to the system. The 'MAX' fields show the maximum length of field used by the system.
Start Position
-
Enter the start position in the interface input file where the field data begins. The first position in the file is '001'.
Length
-
Enter the length of the field in your interface input file. The length cannot exceed the maximum length indicated.
Record Length or Record Segment
-
Enter the physical length of the record in the interface file. This length is used by the program to open the file and Must BE the file's proper record length.
Format Name
-
This is the descriptive field displayed on the processing selection and on profile maintenance screens so that you can identify various formats.
-
Enter into the field to change and press Enter.
-
Click on Cancel to exit the interface program.