
When creating a rotating schedule for employees it is important to ensure that the schedule starts on Day 1 of the rotating schedule. If their assignment starts on a day that is not Day 1, a schedule needs to be created for the period of time between the assignment start date and Day 1.
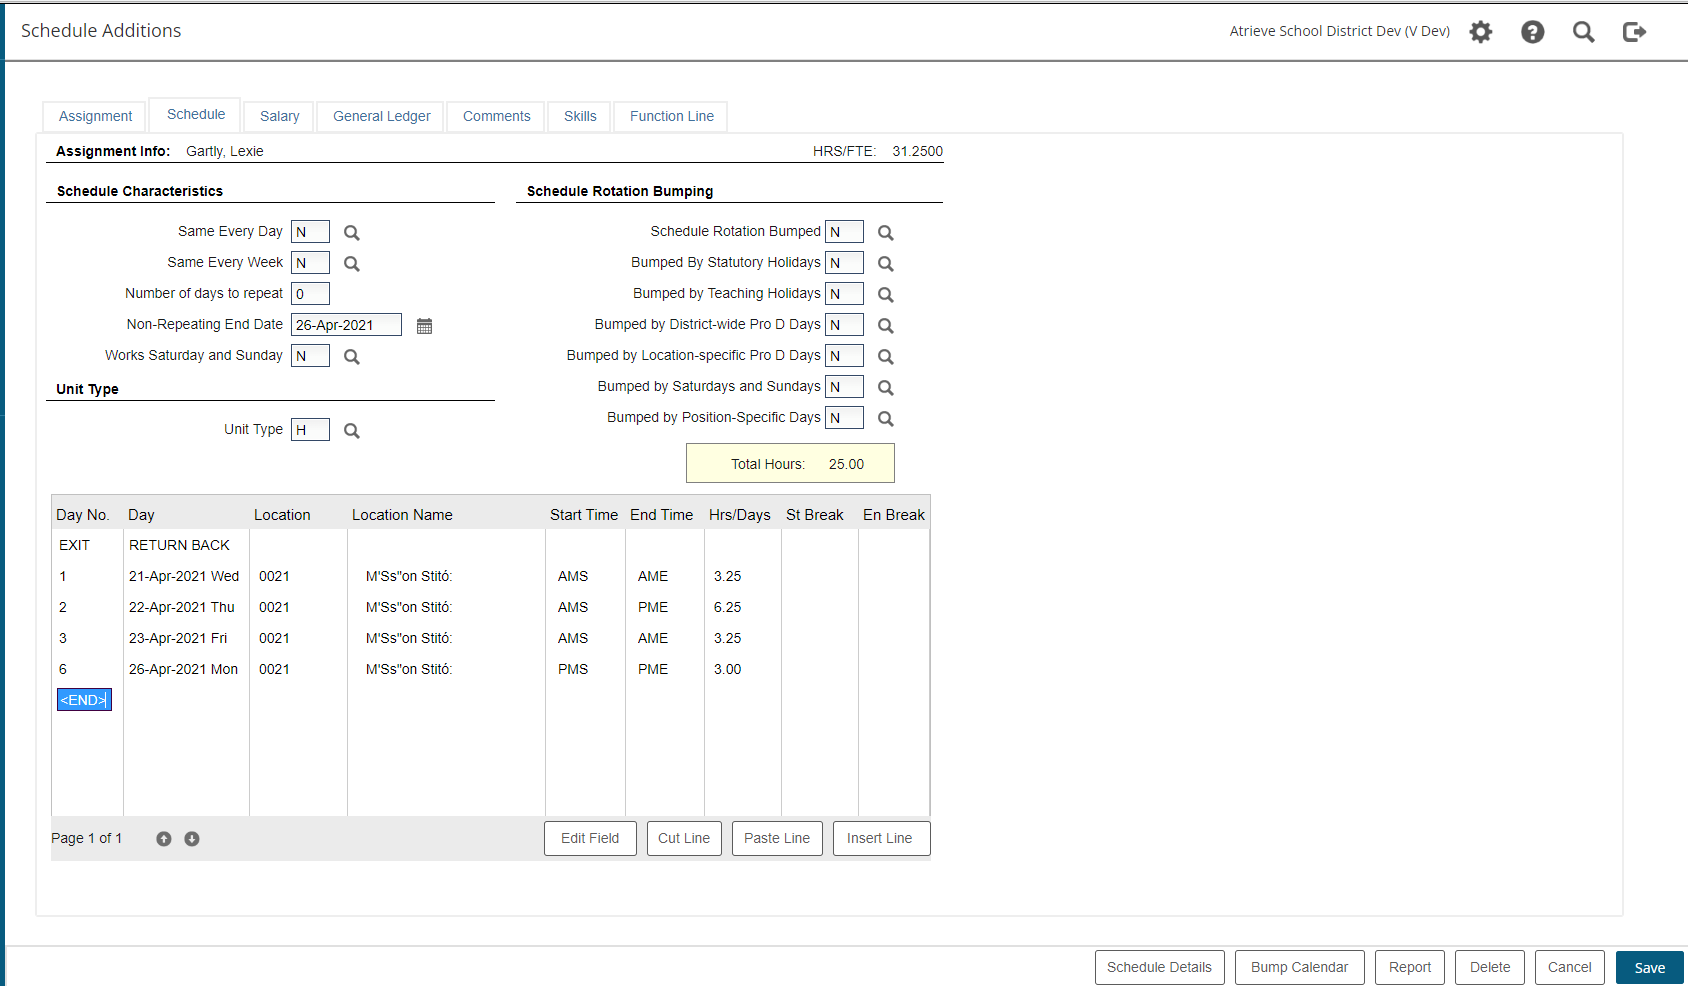
Scenario 1: If the employee has a 6 day rotating schedule and the Assignment start date falls on a day 3, a non-repeating schedule will need to be created that ends on the date that proceeds the very next Day 1. Example - Assignment starts April 21, 2021 (day 3), this schedules end date will be April 26, 2021, which is the Districts Day 6.
Enter into Assignment Changes
Select Employee
Select Schedule tab
First Schedule:
Same Day = N
Same Every week=N
Number of Days to Repeat=0
Non-Repeating End Date=20170907 (as per example)
Create the schedule according to how the Employee is working for those days.
Save this schedule entirely so that you are back in the assignment screen.
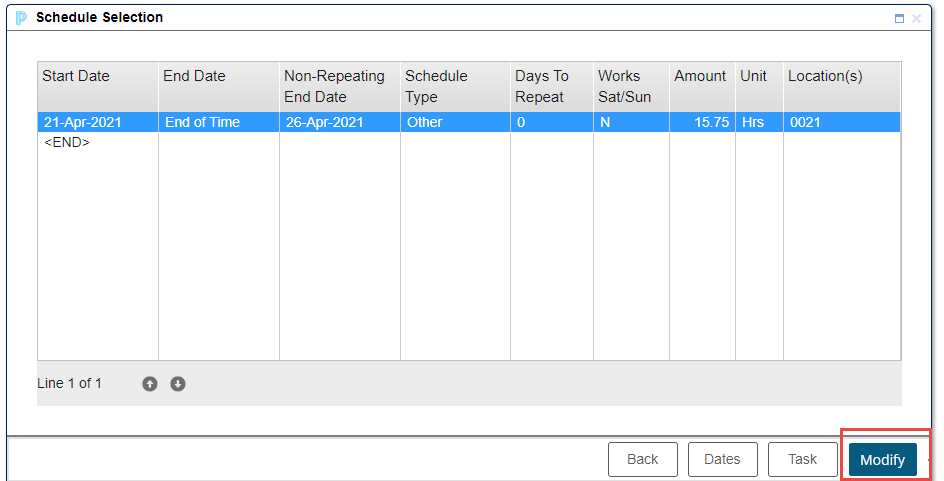
After the schedule as been saved, select the schedule tab once again to modify the schedule.
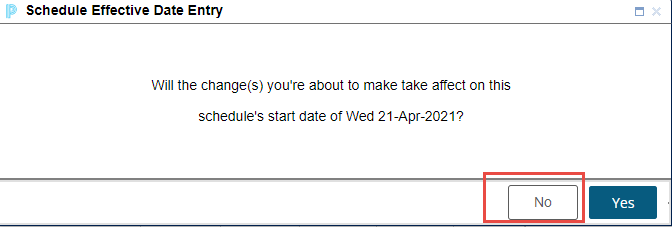
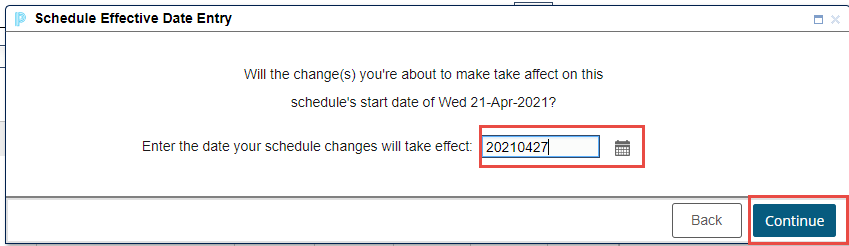
On the Schedule screen once you click into the Same Every day field, a Schedule Effective Date Entry popup will appear "will the change(s) you're about to make take affect on this schedule's start date of Wednesday 21-Apr-2021." Answering no will allow the entry of the schedule to start on the Day 1 which is April 27, 2021
Indicate on the next screen which day the changes will take affect. This will be the date that falls on the next Day 1 of the employees schedule. For this example we are using the date of April 27, 2021
Answer Yes to Recalculate Day Number Because Start Date Has Changed

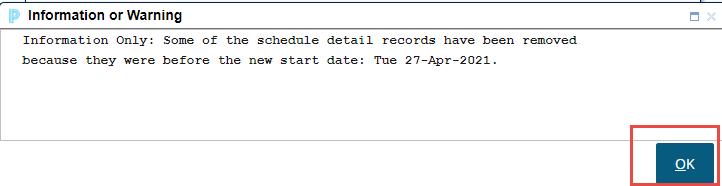
Click on OK to the Information page that shows, in the schedule details page, the next steps will populate the schedule details
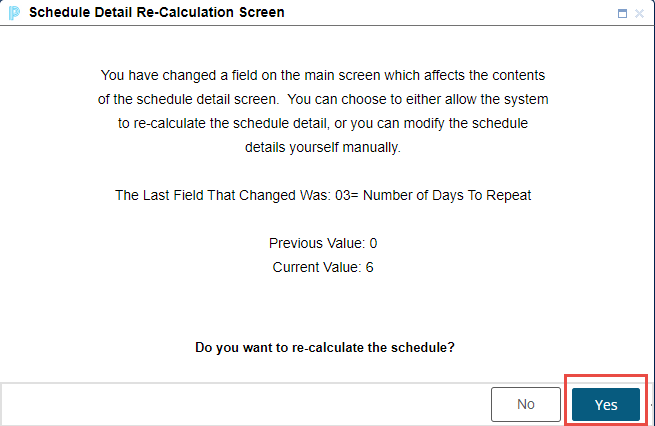
Click into the Number of Days to Repeat and enter in 6
Answer YES to Schedule Detail Re-Calculation Screen.
All these Prompts bring you to the second schedule. The second schedule will now start on day 1, and will align with your districts working days. Therefore it will be correct for the employee during absence entry.
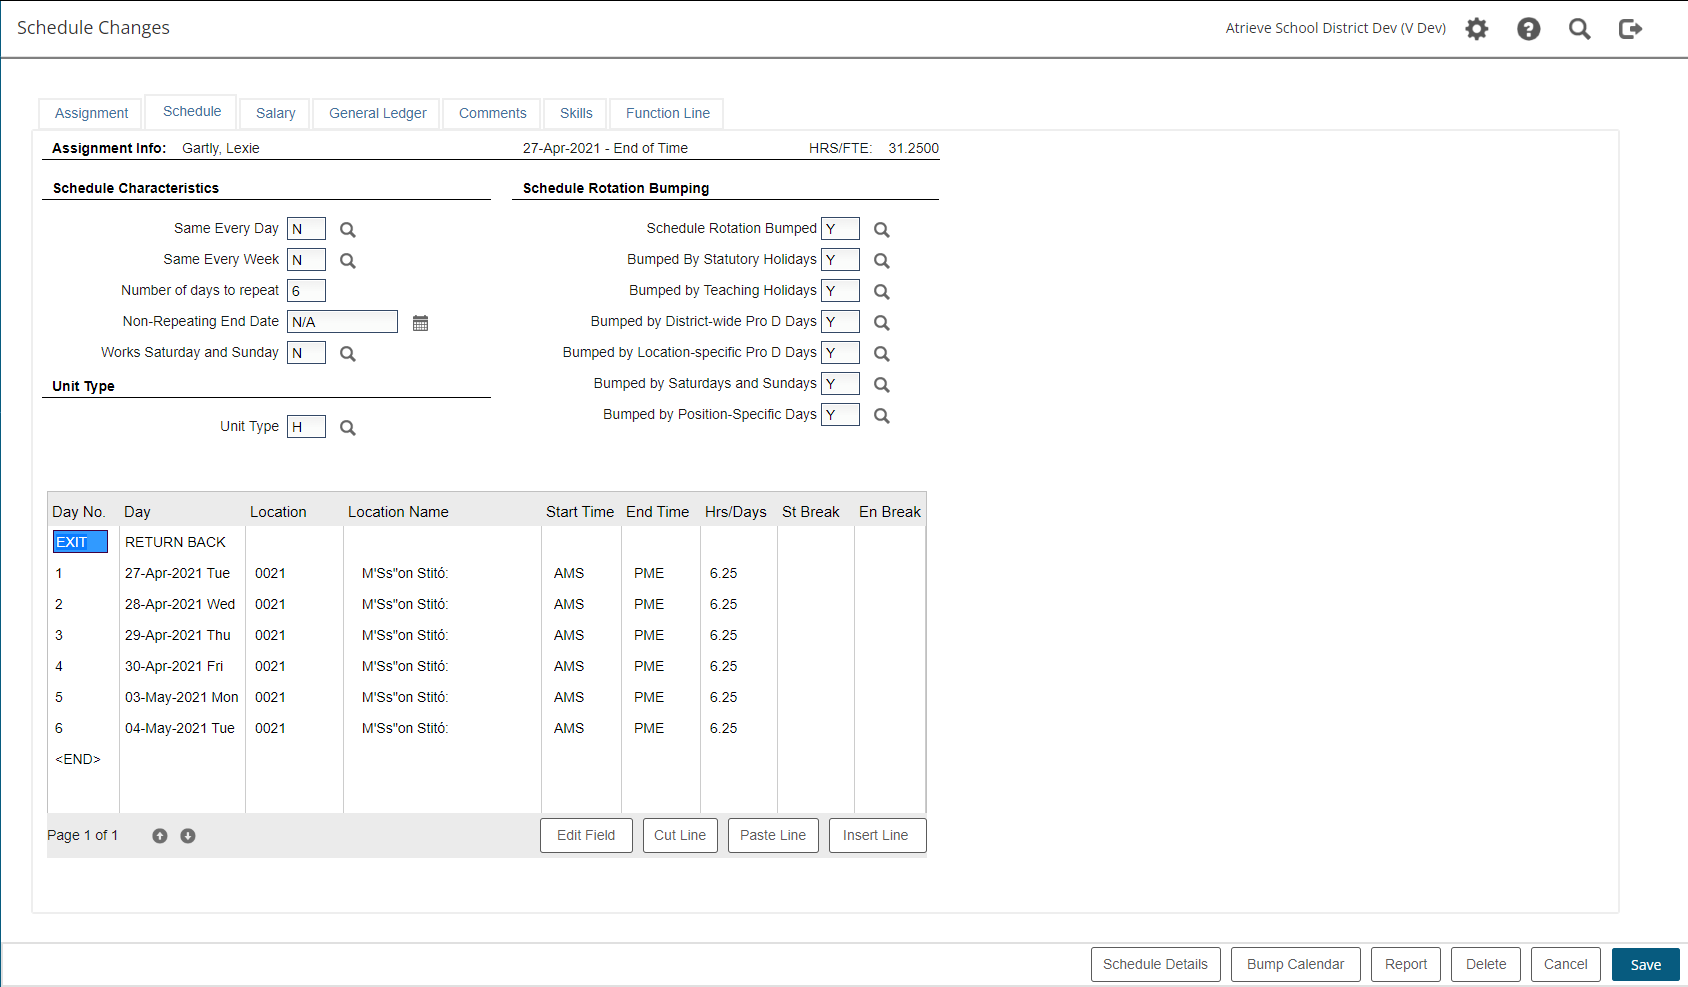
Second Schedule:
Same Every day=N
Same Every Week=N
Number of days to repeat=6 (according to example)
Enter in Schedule Rotation bumping as desired by district.
Answer YES to Schedule Detail Re-Calculation Screen once again.
Edit the the schedule details to reflect the employees schedule and select save.
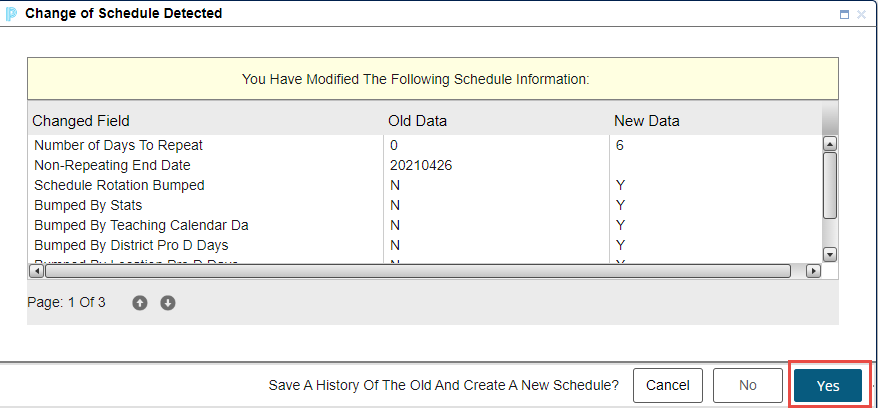
When prompted to Save a History of the Old and Create a New Schedule Say Yes.
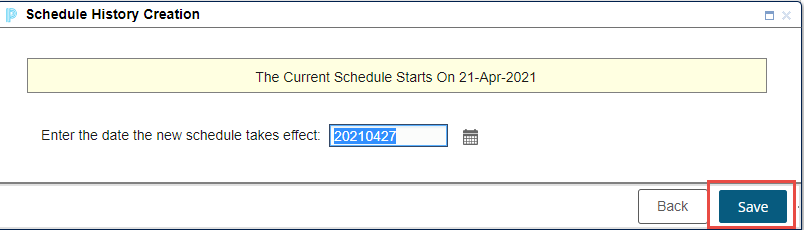
At the Schedule History Creation Screen select save.
The rotating schedule is now complete. To verify that the schedule is correct, run the Schedule report.
Scenario 2:
Assignment starts in a previous year. For example, the assignment starts in 2020 but you need to create a 5-day repeating schedule starting September 6, 2022.
*For Schedule Entry Web users, you can start a schedule on any date, so in this case where the new schedule begins September 1, you can create the schedule in Schedule Entry Web on September 1 without needing to create the 2016-2018 placeholder schedule as the atrieve directions describe.
Atrieve Instructions:
-
Create a basic schedule (accept all the defaults) and save.
-
Go back into the schedule button again. and choose modify
-
Change the field Same Every Day to N, and Number of days to repeat to 5. Select Save.
Prompt: “Do you want to re-calculate the schedule?” Click YES. -
Now create your Day 1-5 schedule that starts this current school year (ignore the Day, focus on the Day No.). Select save.
Prompt: “Save a history of the old and create a new schedule”. Select YES.
Prompt: “Enter the date your schedule changes take effect” = enter the first day of the school year (even if the school year starts on a PD).
Prompt: “You have modified the start date of this schedule. Do you want the system to re-calculate the Day Numbers of each schedule detail line…” Select No.
Prompt: “Enter the date the new schedule takes effect” (it will put in the date you already entered.) Select Save.