
Prerequisites
-
A Google account for the school district
-
PowerSchool provided URI for the configuration steps in this document.
Getting Started
Go to https://console.cloud.google.com/apis and sign in with the account credentials.
Create the Google OAuth 2.0 Client ID and secret
-
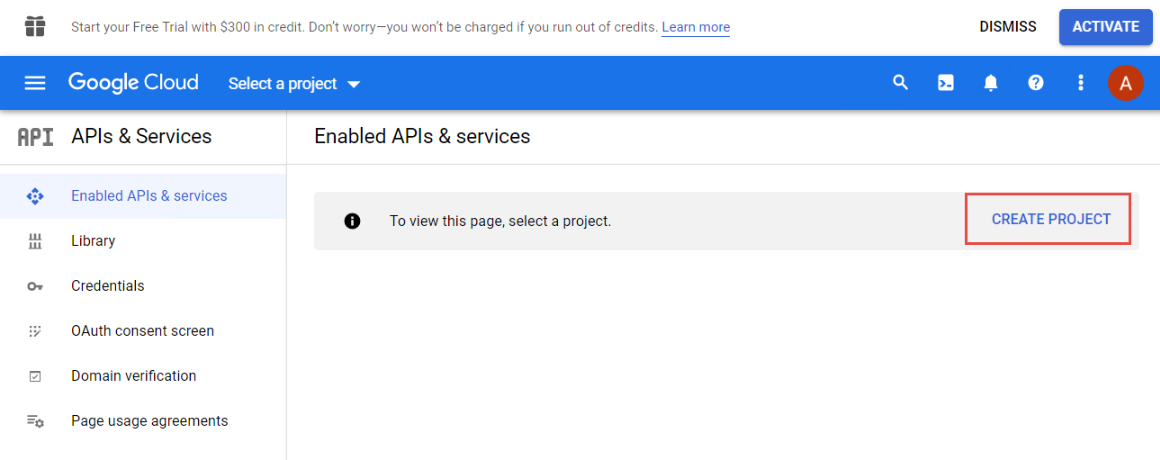
Select Enabled APIs & services from the menubar
-
either click Create Project or select an existing project
In your new or existing Project;
-
Create a project name called Atrieve-Authentication.
-
Select the appropriate Location for your division.
-
Click Create.

Configure oAuth Consent Screen
-
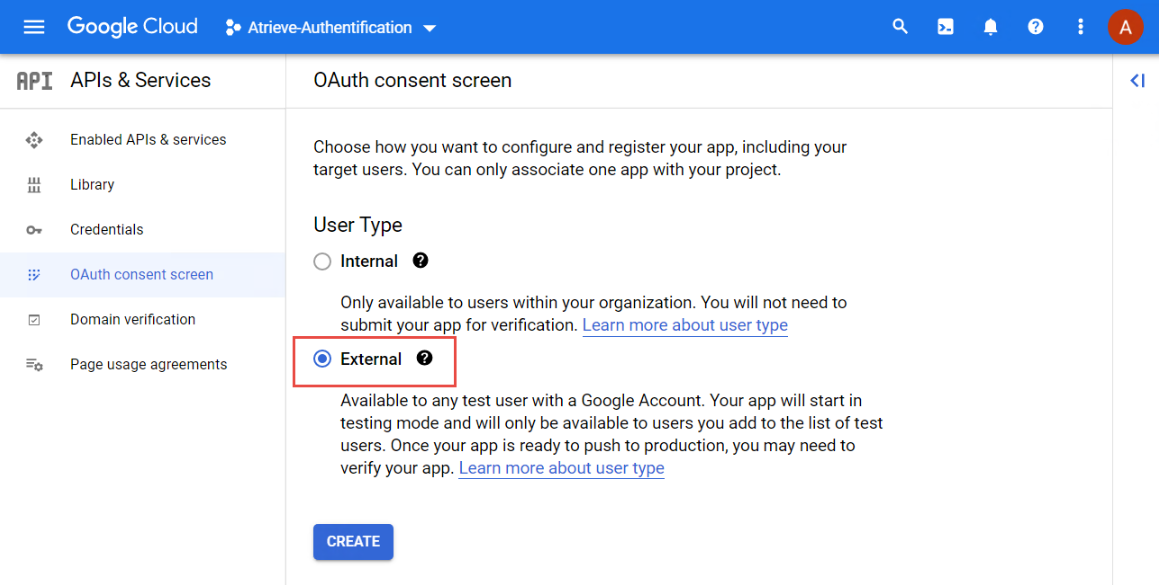
Select Oauth consent screen from the menubar:
-
Select User Type - External and click CREATE.
-
-
In the App information dialog, enter an;
-
app name
-
user support email
-
atrieveerp.com for Authorized domain 1.
-
developer contact information.
-
-
Step through the Scopes step.
All options are optional just click on Save And Continue. -
Step through the Test users step.
All options are optional just click on Save And Continue. -
Review the OAuth consent screen settings and return to the app Dashboard.
Configure Credentials
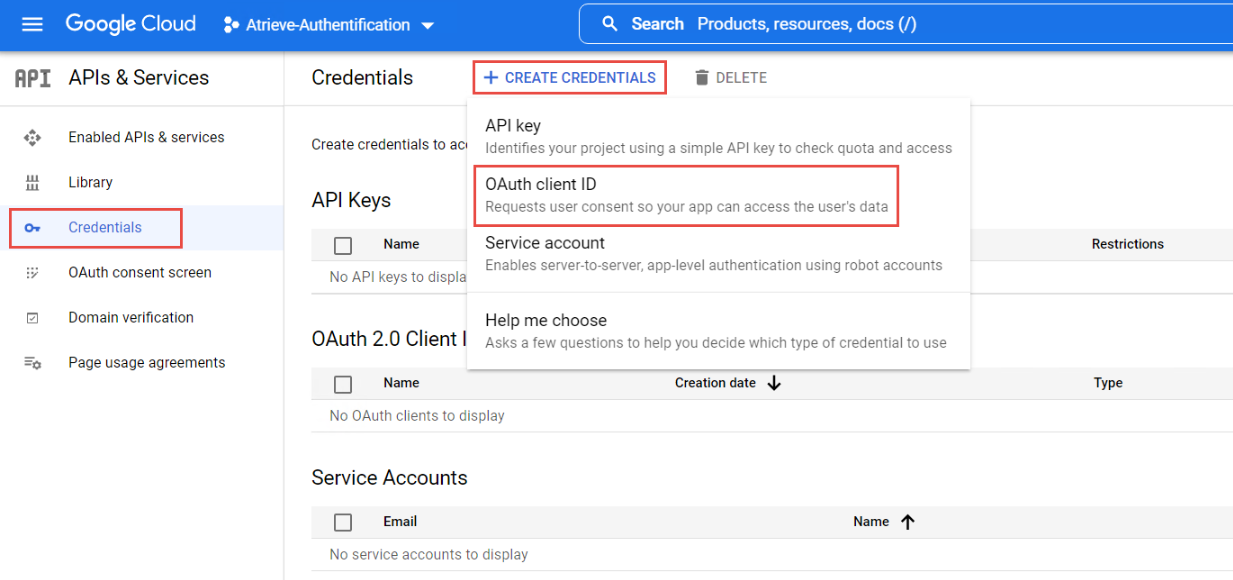
Select Credentials from the Menubar
-
In the Credentials tab of the menubar, select + CREATE CREDENTIALS > OAuth client ID.
-
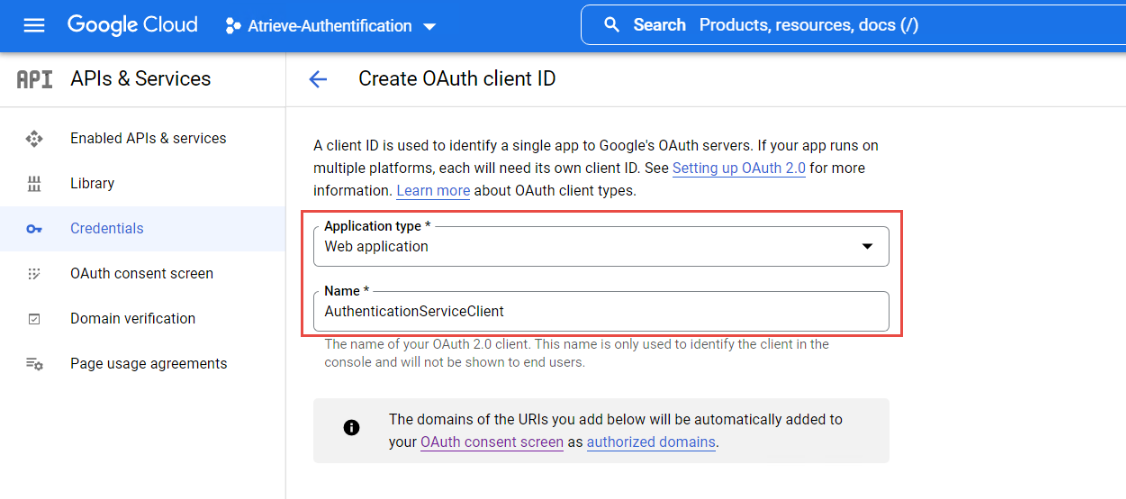
Select Application type > Web application, choose a name.
-
In the Authorized redirect URIs section, select ADD URI to set the redirect URI. Example redirect URI:
https://localhost:{PORT}/signin-google, where the{PORT}placeholder is the app's port.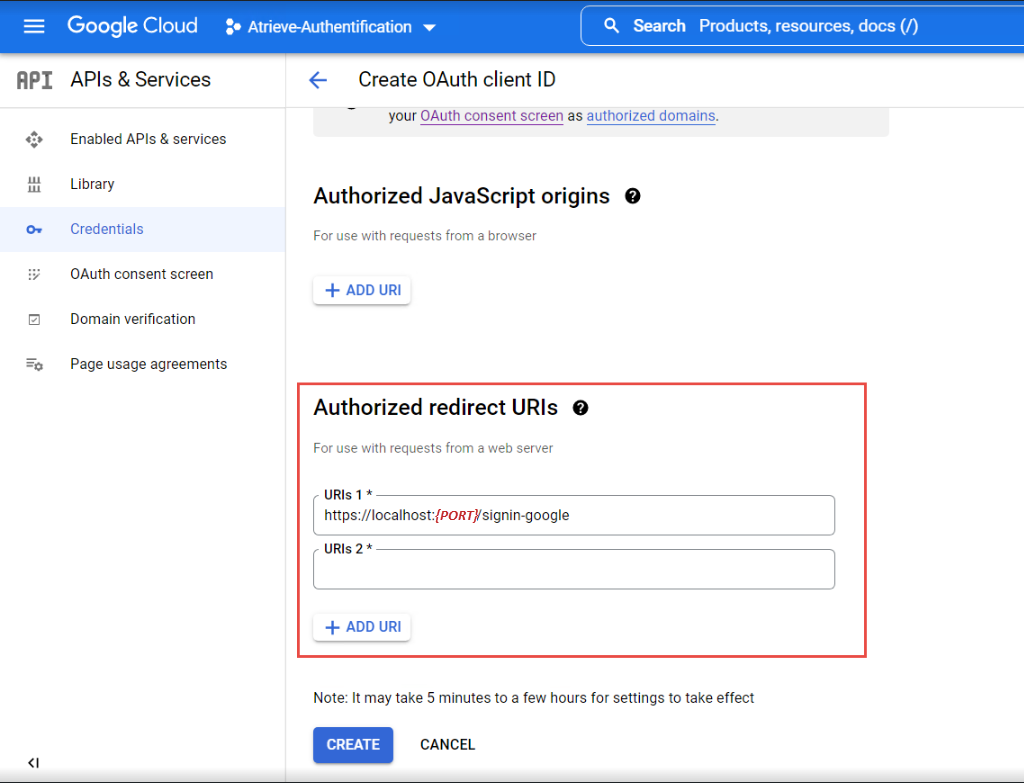
-
Click CREATE.
-
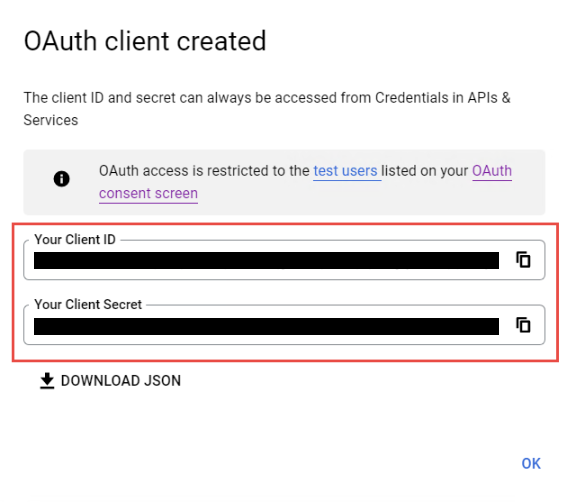
Save the Client ID and Client Secret for use in the app's configuration.
-
When deploying the site, either:
Update the app's redirect URI in the Google Console to the app's deployed redirect URI.
Create a new Google API registration in the Google Console for the production app with its production redirect URI.