
-
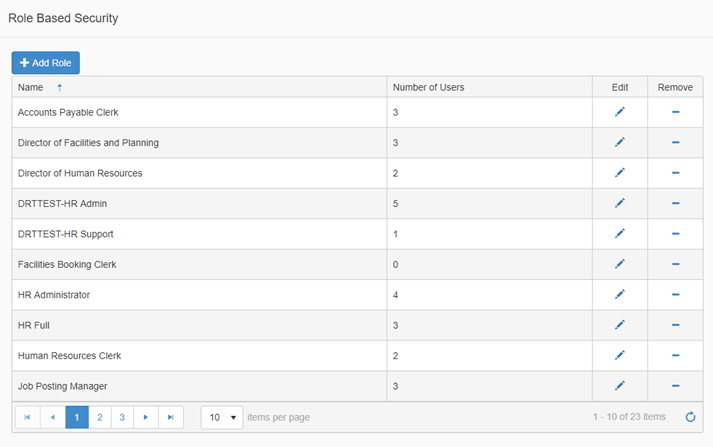
Navigate to Role Based Security, the Roles List page displays a listing of all roles that have been created within the district. Select an existing role to update or click Add Role to create a new role.
-
For the purpose of this document a new Role will be created.
-
Click Add Role, and a window will popup where you can add the role name (i.e. Journal Entry Clerk)
-
Click Save
-
Click Close
-
Locate the new Role in the list and click the Edit pencil
-
-
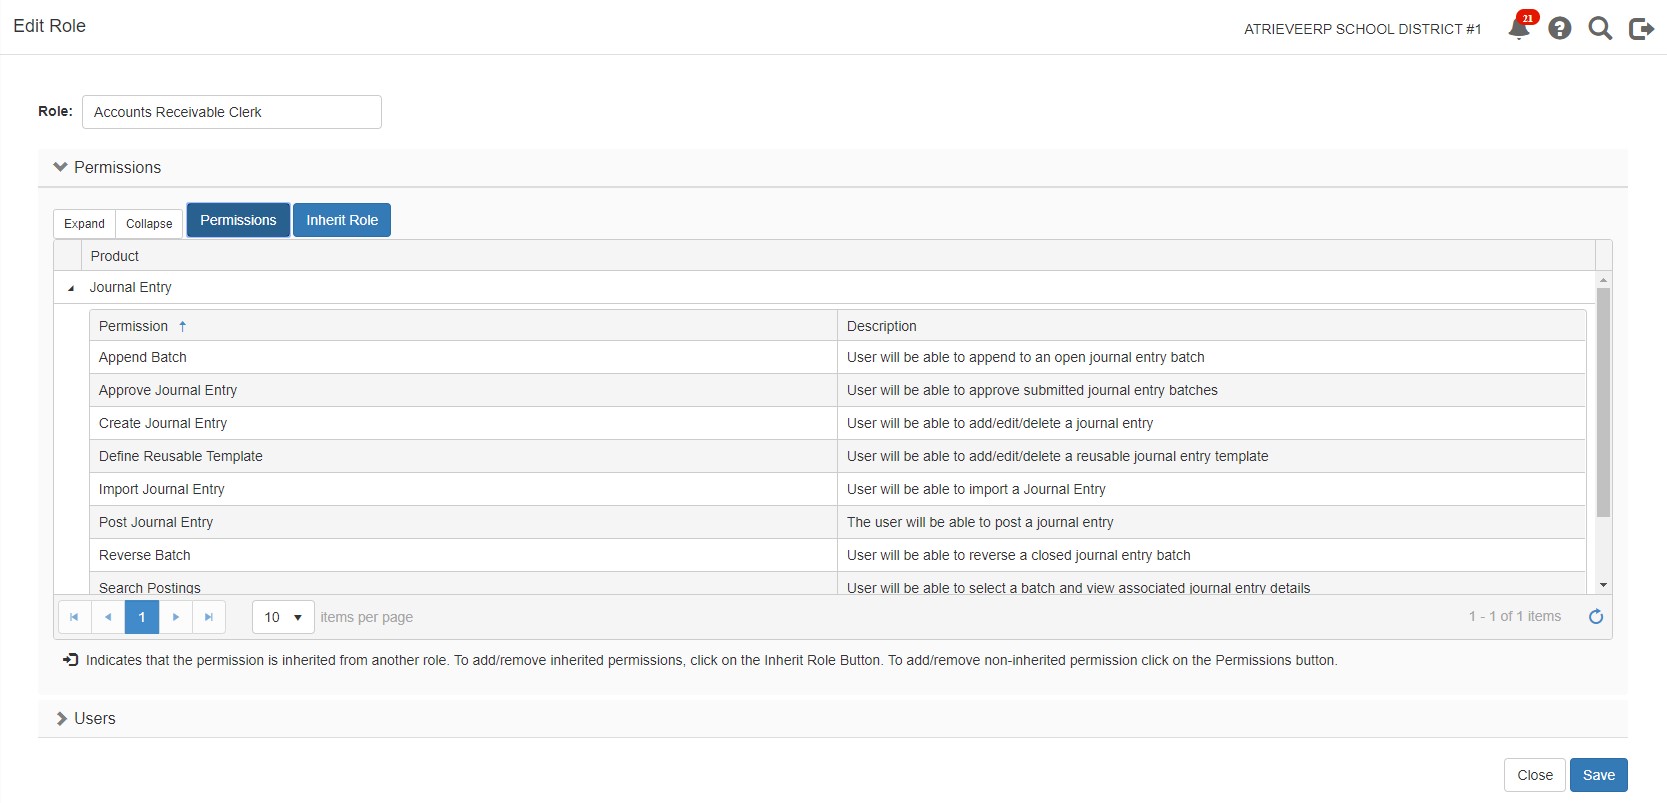
On the Role page you may inherit permissions from existing roles, or you can simply add permissions. This example will show the Add Permission to a Role functionality.
-
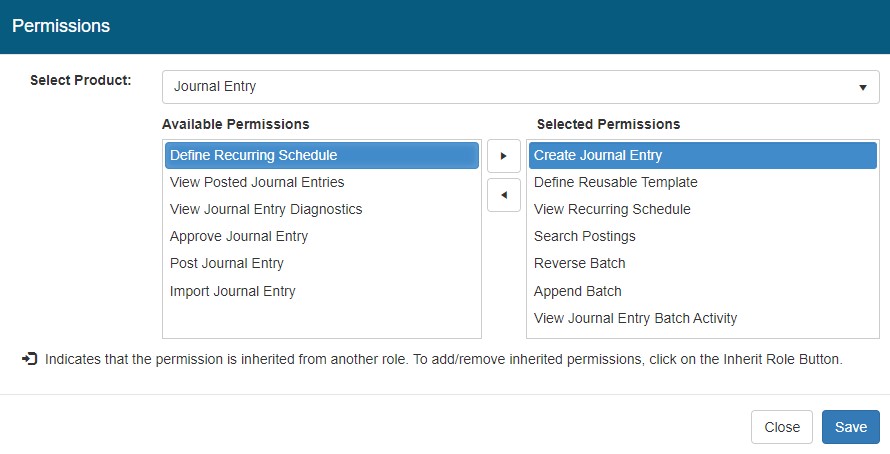
Click the Permissions button, and a window will popup where you can select the permissions to add to the role.
-
Select Journal Entry from the product list, and the list of available permissions will display in the list mover
-
Ctrl+click to multi-select, or single click to select a permission and then click the right arrow
-
Once you are satisfied with your selection, click Save
-
Click Close
-
-
The Role will be updated to include the permissions selected for Journal Entry.
-
You can assign users to this Role by clicking on the Users section near the bottom of the page
-
Search for an employee, using the employee quick search
-
Click Add, and the employee will be added to the Role
-
-
If you need to restrict Batch Types for a Journal Entry Role (i.e. users assigned to a role have batch type code security restrictions when creating Journal Entries), do the following:
a. Click on Users in the left-navigation menu, search for the user and then in the Constraints section verify that the Batch Type Security is configured correctly (add/edit/delete as needed).

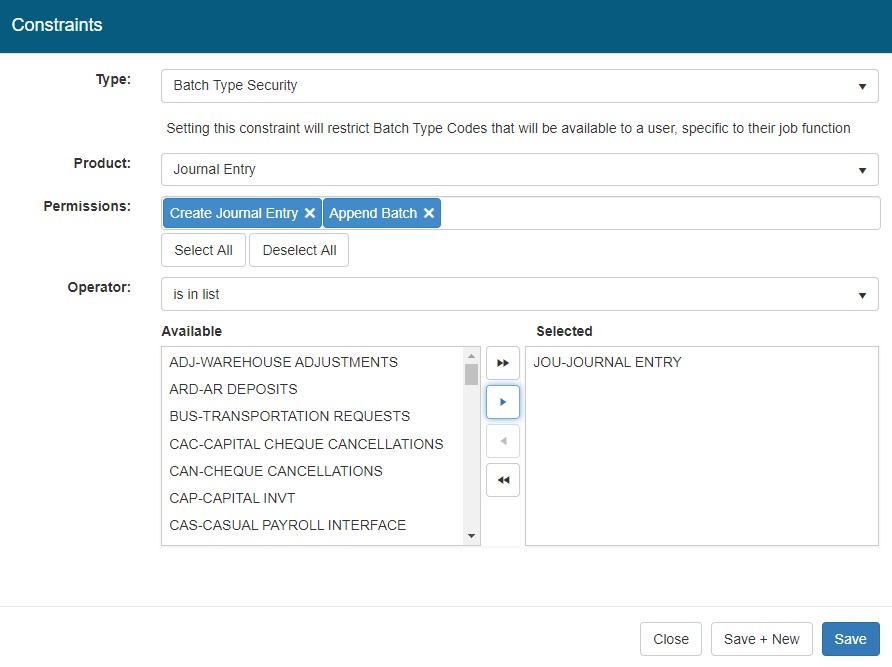
Constraints
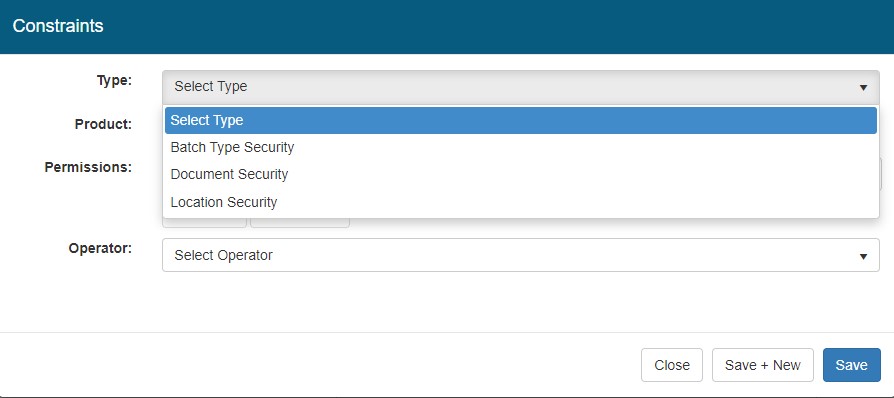
1. To Add a Constraint, click the Add Constraint button and the Add Constraint pop-up window will open
-
-
Select the Type – Batch Type Security
-
Select the Product – Journal Entry
-
Select the Permissions (individually select permissions or click Select All or Deselect All)
-
Select the Operator (is in list or is not in list)
-
Select one or more values from the Available list and move to the Selected list
-
2. Click Save to save the Constraint or click Save + New to clear the form and add a new constraint, otherwise click Close to disregard
Once the Role(s) and permissions have been created/updated and assigned to the appropriate users, you will also need to update the Menu options shown to your Journal Entry users so they can use the options just provided in their new Role Based Security options.
Menu Builder Updates:
-
From menu select Tools > Security & Setup > Menu Builder
-
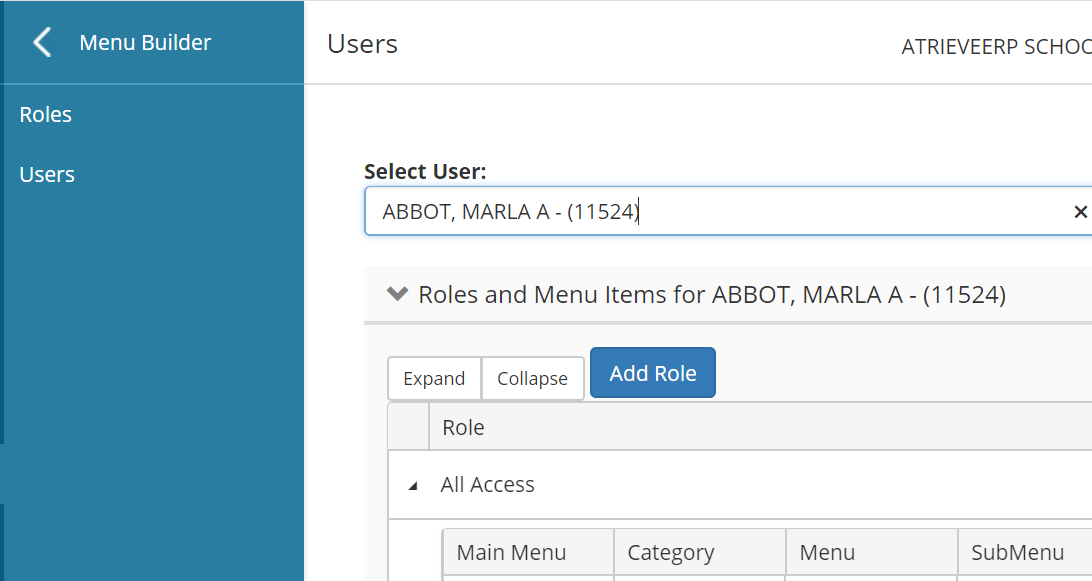
If you're unsure what Role a user is in you can use the User menu to search from them and it will display which security role they are in
-
To update the role, click Roles from the left-hand Menu Builder Menu
-
Find the Role you need to update and click the Edit button
-
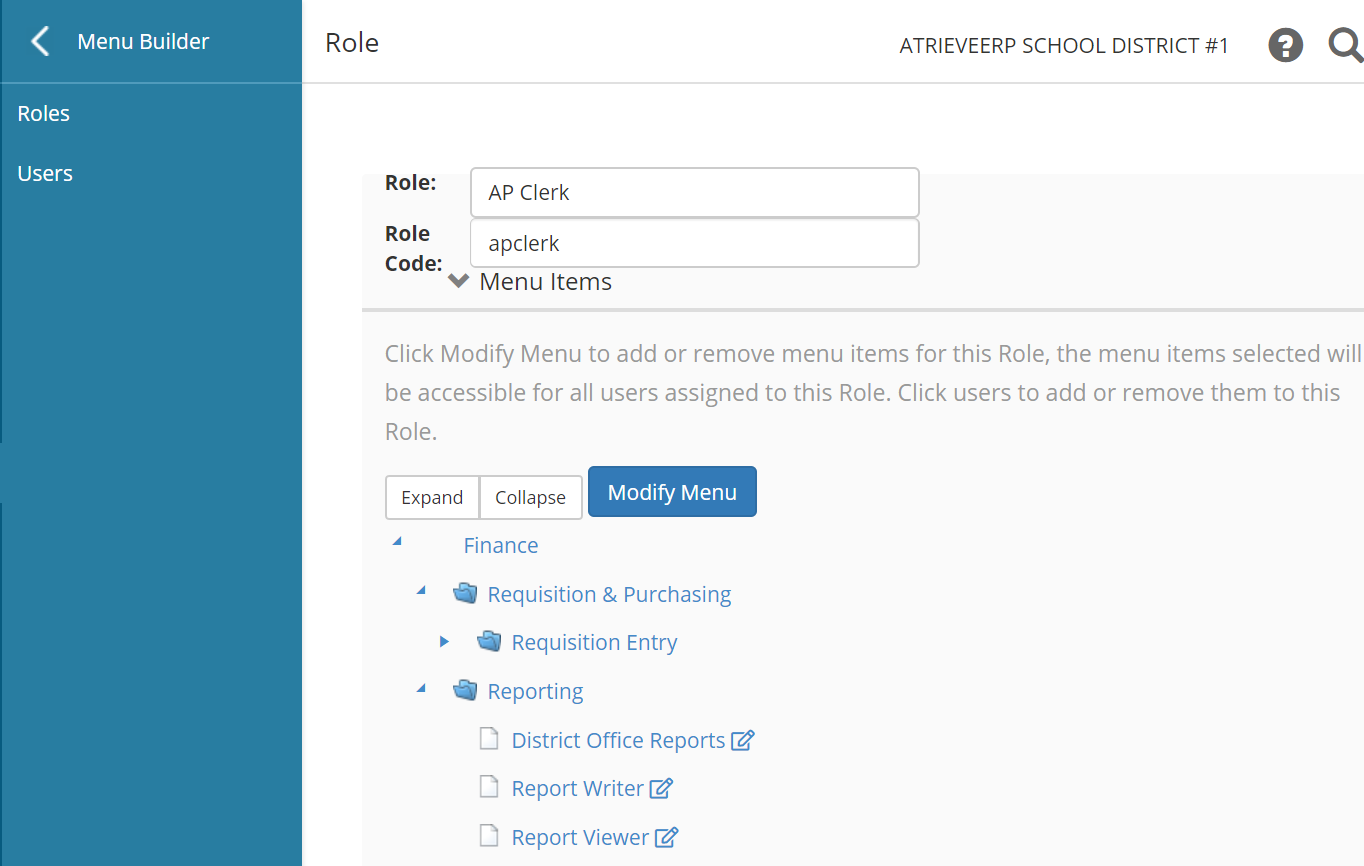
Click on Finance > Data Entry to see if the users Role has access to Journal Entry. The example below indicates there is no Data Entry option for Journal Entry for the AP Clerk role:
-
Click on Modify Menu and then search for Finance to find options available for Finance modules.
-
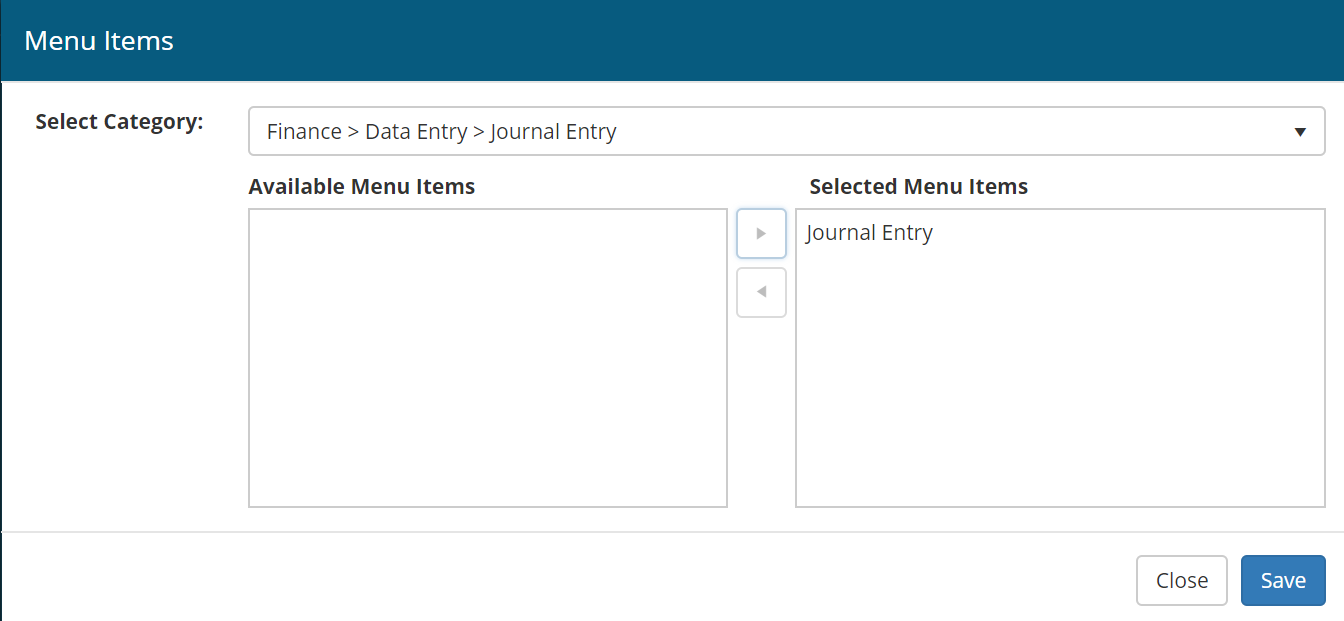
You will be shown a Finance > Data Entry > Journal Entry option and click on it to select.
-
Once selected, it will show you any options available for Journal Entry. Click on Journal Entry to select it and click on the arrow to move it into the "Selected Menu Items" list so it will be added to this roles menu.
-
Click Save to save the selection and Save again to save the Role Menu changes.
-
Repeat this for any roles your Journal Entry users are in so they will have the Journal Entry menu options in their Finance portal list. Alternatively, you can create new Role for Journal Entry and add all users using the Journal Entry module into this one role in Menu Builder. This is useful if some of your existing Roles include users that don't need access to the Journal Entry module.
You are ready to start using the new Journal Entry feature. You can view the video on Journal Entry Roles Setup below.