
Prerequisites
-
An Azure account that has an active subscription.
-
The Azure account must have permission to manage applications in Azure Active Directory (Azure AD). Any of the following Azure AD roles include the required permissions:
-
Integration of Atrieve to Azure AD. See https://atrieve.powerschool-docs.com/atrieve-global/latest/configure-atrieve-authentication-to-integrate-with
-
PowerSchool provided URI for the configuration steps in this document.
IMPORTANT INFORMATION
This process requires setting a timeline for the Client Secret to expire (explained in the instructions below).
Azure allows a maximum of 24 months before expiry. Once the client secret expires, users cannot log into Atrieve, until a new one is generated.
PowerSchool cannot access your division’s instance of Azure so therefore cannot monitor the expiry date on behalf of your division. We recommend that your division take the necessary steps to calendarize the renewal of the client secret in advance of its expiry so that user access is not interupted.
PowerSchool will require at least 1 business day to update a new client secret value in our hosted environment.
Register an application in Azure
Registering your application establishes a trust relationship between your app and the Microsoft Identity Platform. The trust is unidirectional: your app trusts the Microsoft Identity Platform, and not the other way around.
Follow these steps to register Atrieve:
-
Sign in to the district’s Azure portal.
-
If you have access to multiple tenants, use the Directories + subscriptions filter in the top menu to switch to the tenant in which you want to register the application.
-
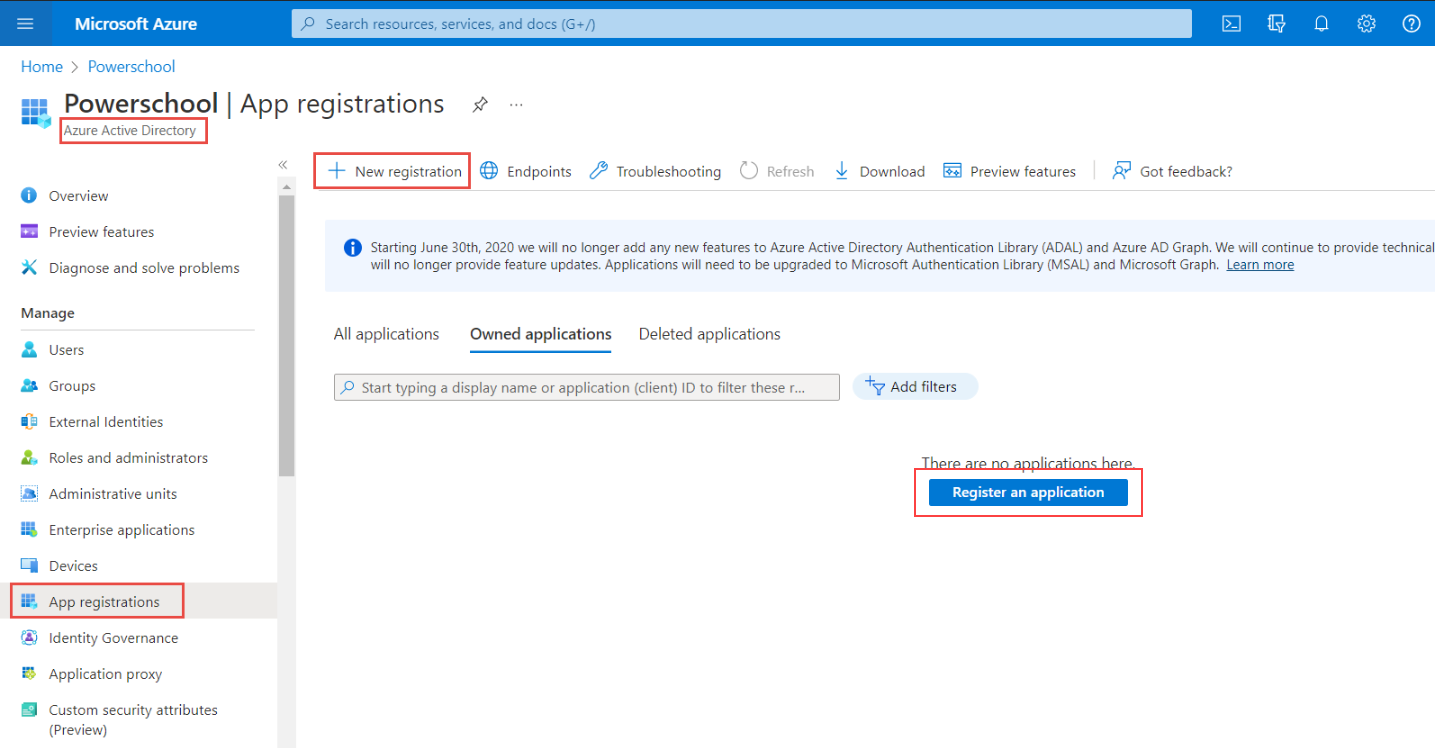
Search for and select Azure Active Directory.
-
Under Manage, select App registrations > New registration.
-
Select Register an application.
-
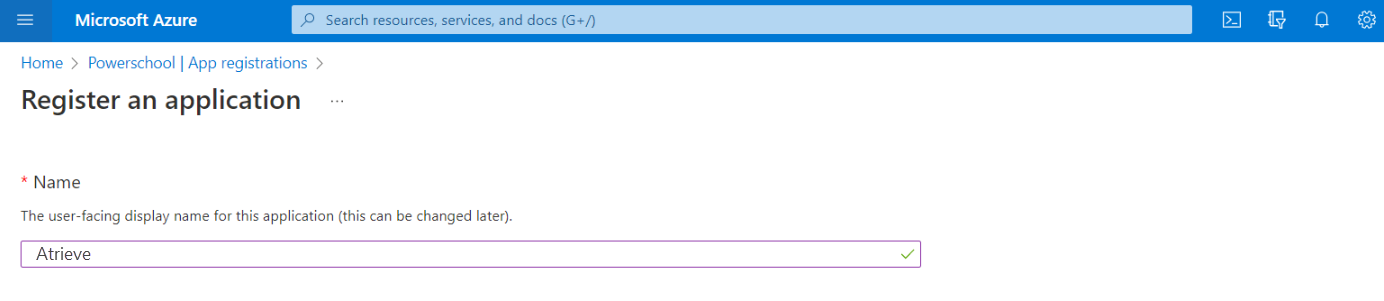
Enter Atrieve as the Name (user-facing display name).
-
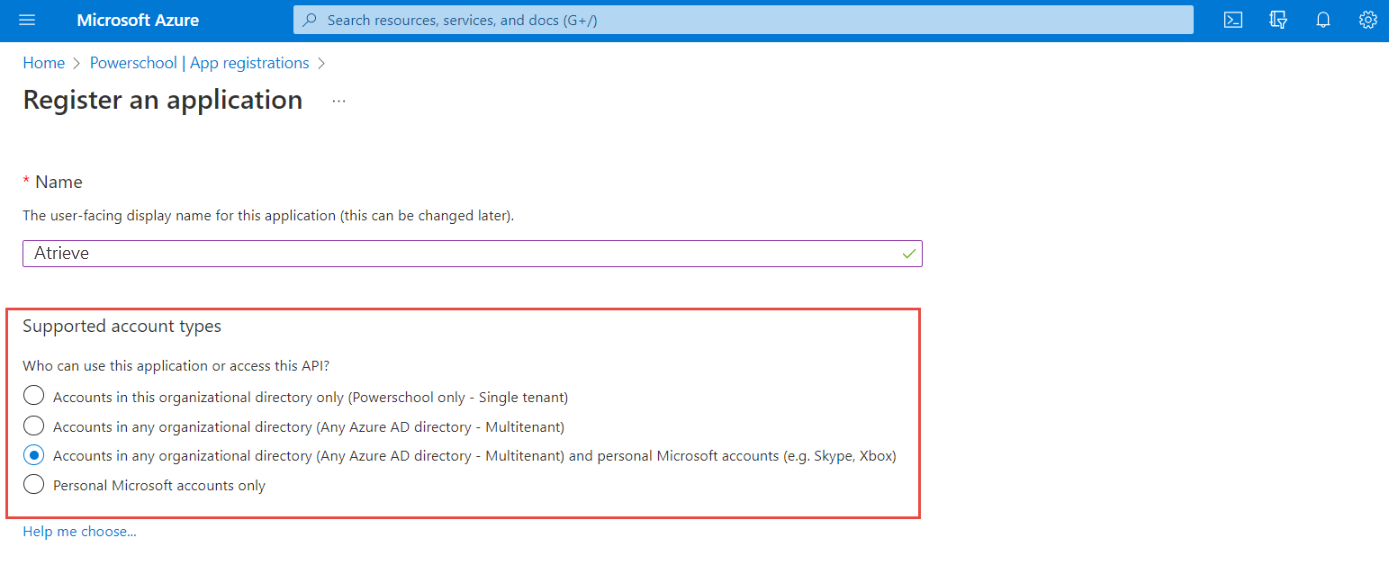
Specify who can use the application, sometimes called its sign-in audience. Select Accounts in any organizational directory (Any Azure AD directory - Multitenant) and personal Microsoft accounts (e.g. skype, Xbox).
-
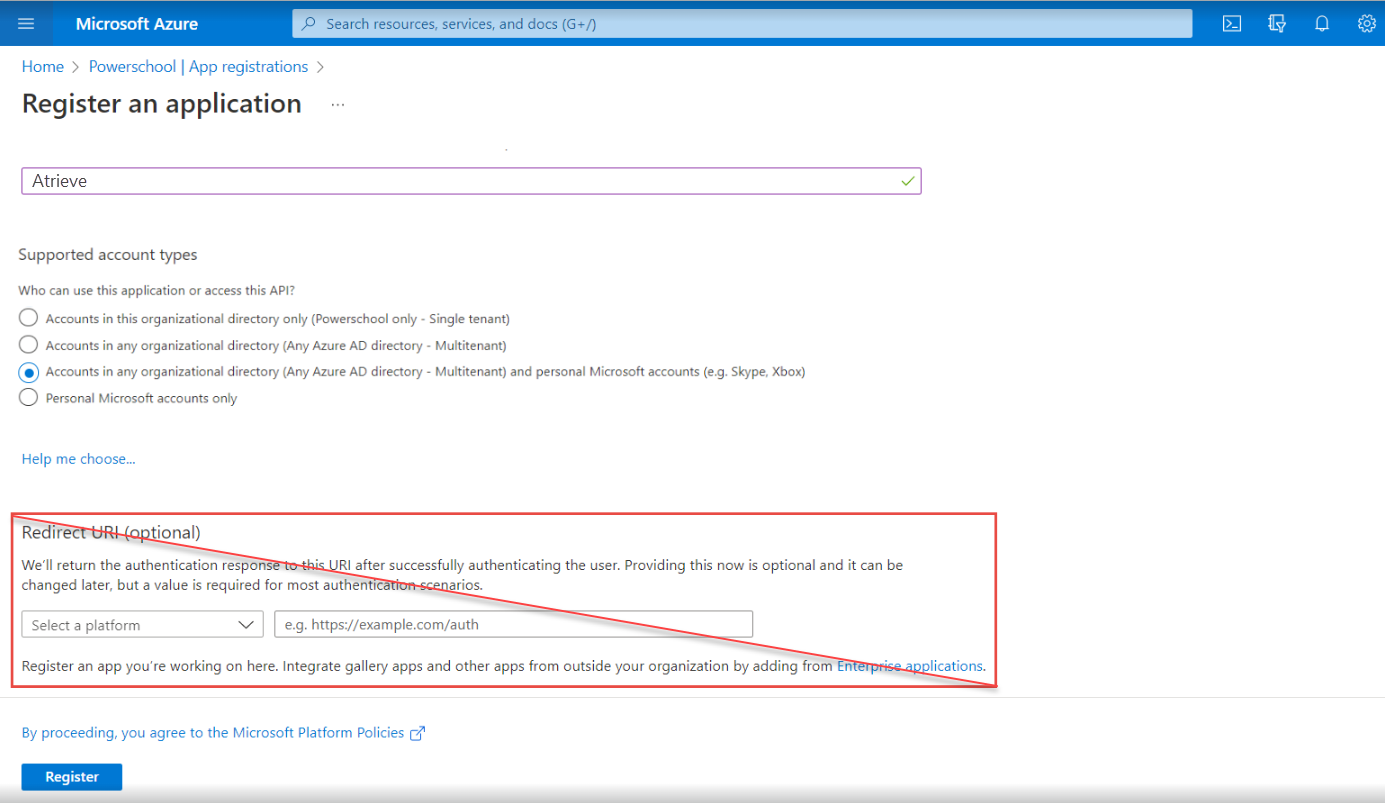
Do not enter any values for Redirect URI (optional). You will configure a redirect URI in the next section of instructions.
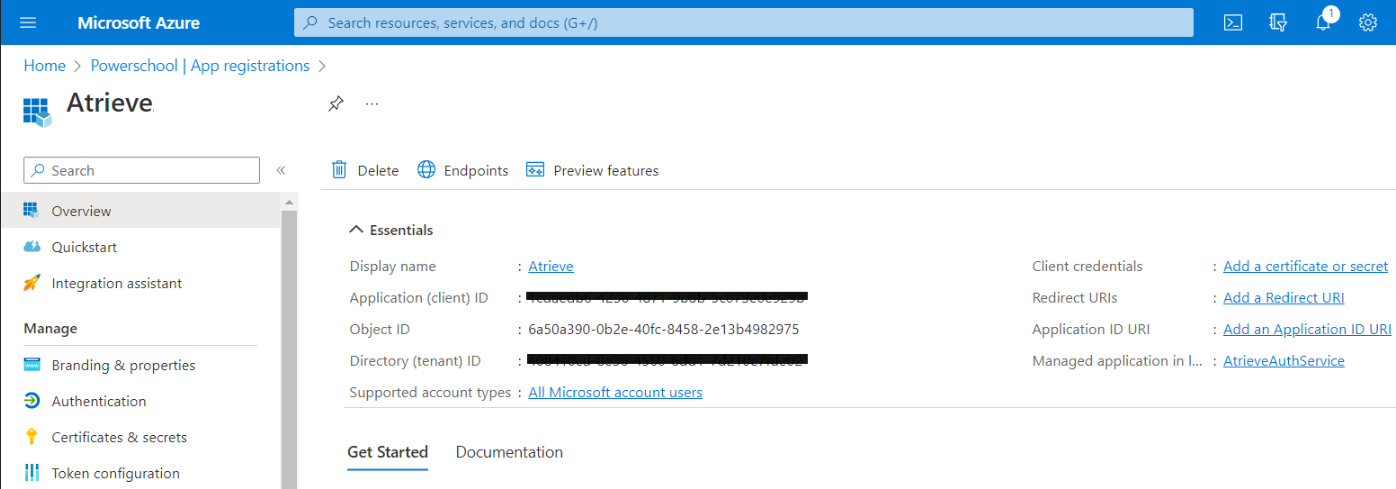
When registration finishes, the Azure portal displays the app registration's Overview pane. The Application (client) ID value uniquely identifies your application in the Microsoft identity platform.
The ID is used as part of validating the security tokens it receives from the identity platform.
Configure platform settings
The redirect URI needs to be manually specified. To configure for Atrieve, follow these steps:
-
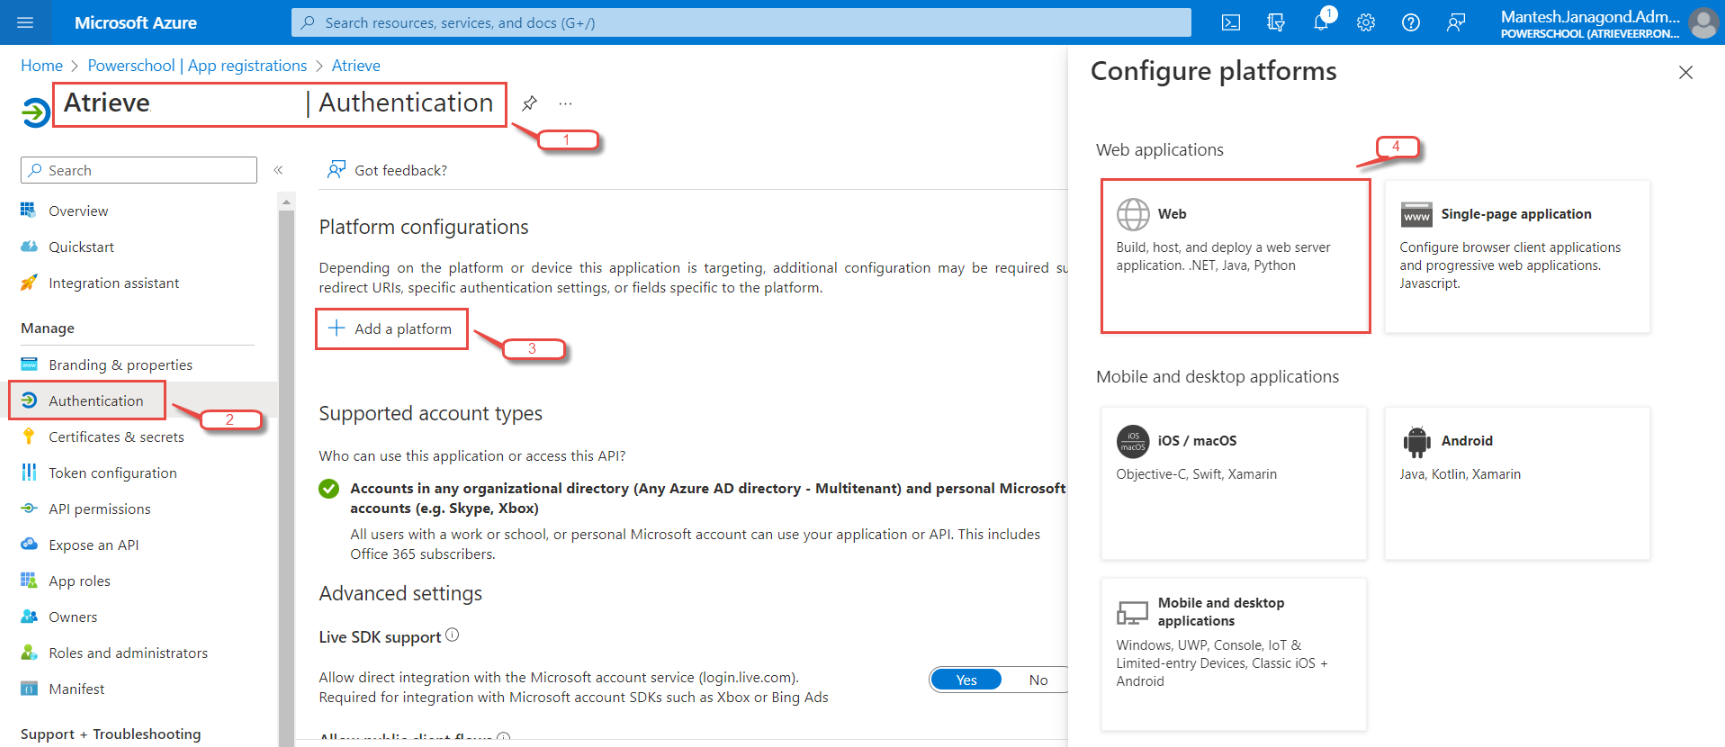
In the Azure portal, in App registrations, select your application.
-
Under Manage, select Authentication.
-
Under Platform configurations, select Add a platform.
-
Under Configure platforms, select the Web tile to configure its settings.
-
On the Configure web panel, enter the URI provided by PowerSchool in the Redirect URI field, and then navigate to the Implicit grant and hybrid flows section to check the checkboxes;
- Access tokens
- Id tokens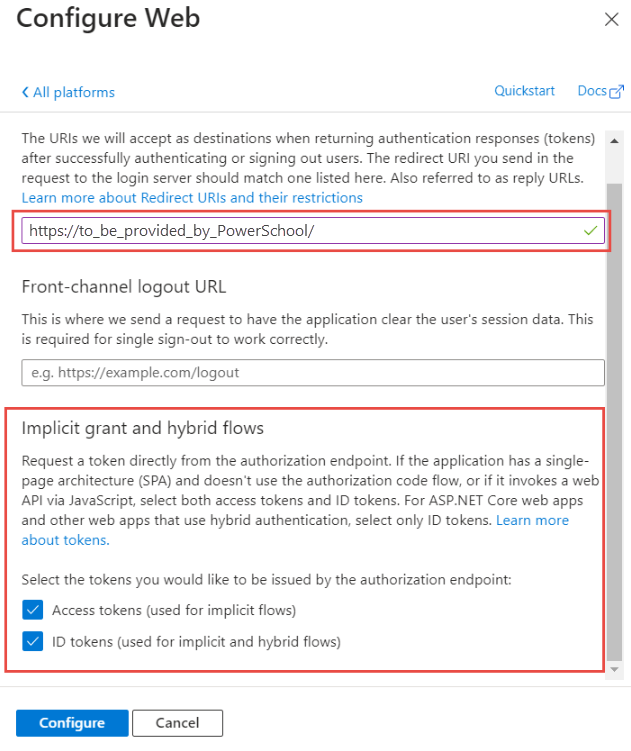
Add credentials
Credentials are used by confidential client applications that access a web API. Examples of confidential clients are web apps, other web APIs, or service-type and daemon-type applications. Credentials allow your application to authenticate as itself, requiring no interaction from a user at runtime.
You can add both certificates and client secrets (a string) as credentials to your confidential client app registration.
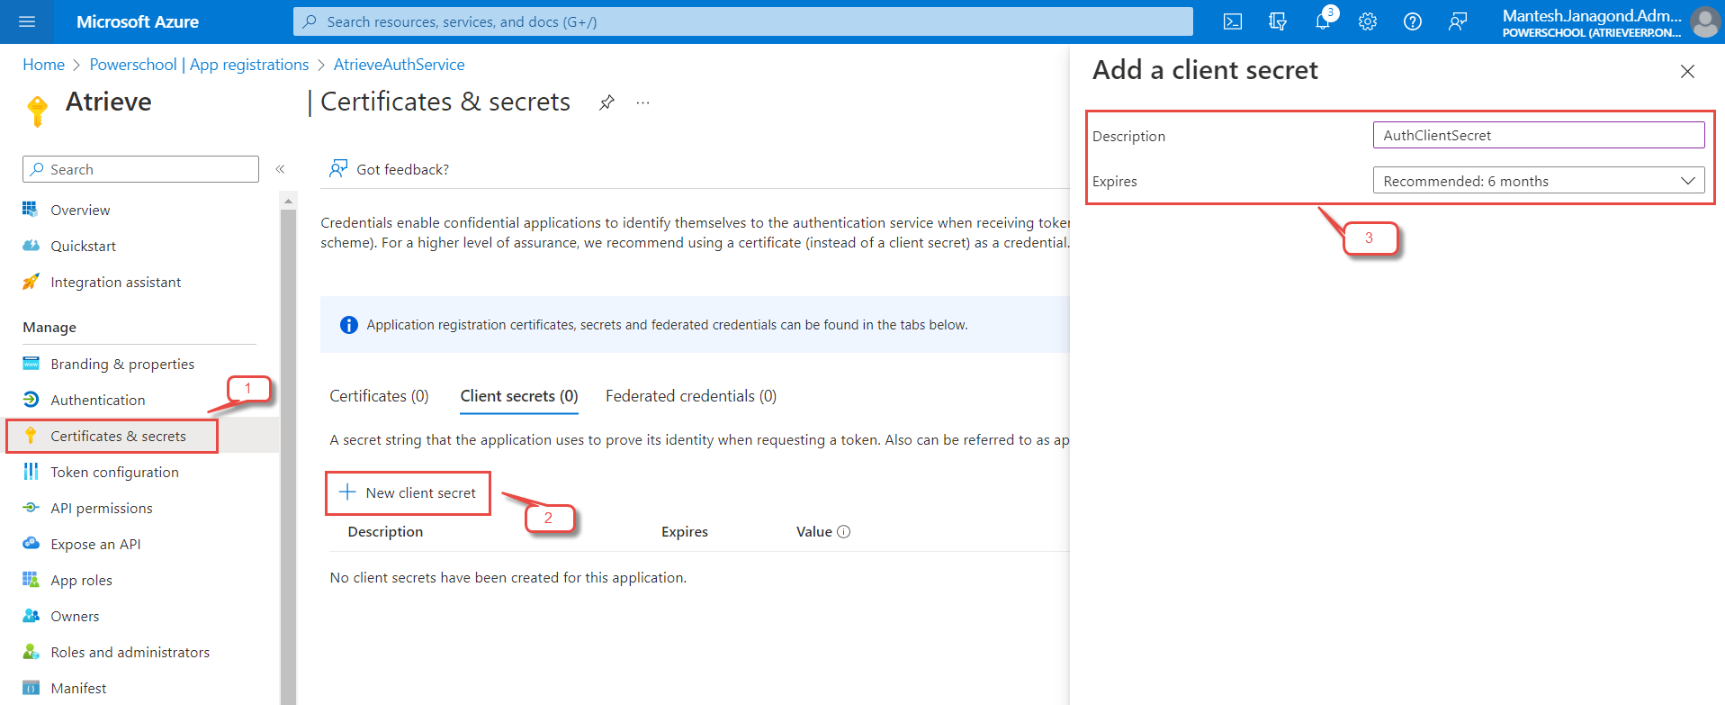
Add a Client Secret
-
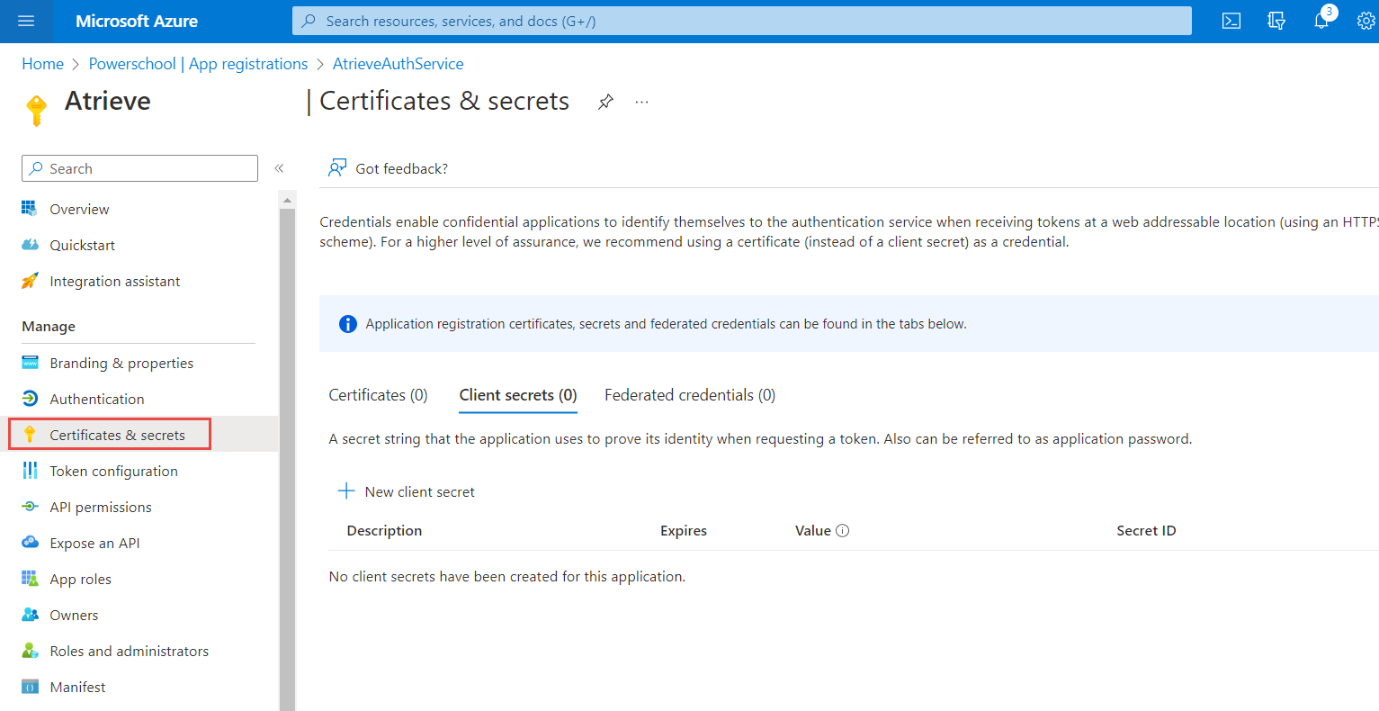
In the Azure portal, in App registrations, select your application.
-
Select Certificates & secrets > Client secrets > New client secret.
-
Add a description for your client secret.
-
Select an expiration for the secret or specify a custom lifetime.
-
Client secret lifetime is limited to two years (24 months) or less. You can't specify a custom lifetime longer than 24 months.
-
When the Client Secret expires, a new one has to be generated by your division and provided to PowerSchool to re-enable logins to Atrieve. PowerSchool does not have access to your Azure instance and therefore cannot monitor your division’s expiry date. It is your division’s responsibility to provide a new secret in advance of expiry to ensure user access is not disabled.
-
-
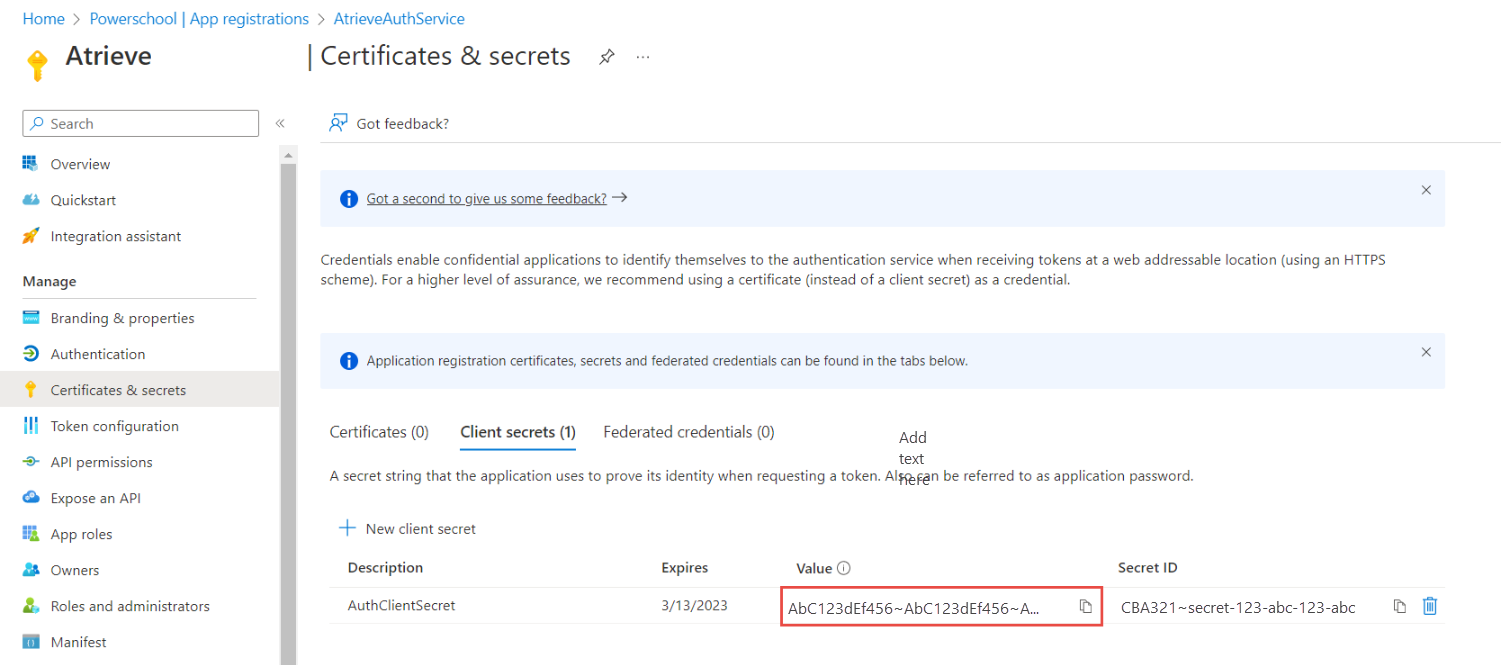
Select Add.
-
Record the secret's value for use in your client application code.
This secret value is never displayed again after you leave this page. Make sure you have it documented for future reference.
Provide the Client ID and Client Secret to PowerSchool to configure in the Atrieve application.
Store the Microsoft client ID and secret
Store sensitive settings such as the Microsoft Application (client) ID found on the Overview page of the App Registration and Client Secret you created on the Certificates & secrets page.