
-
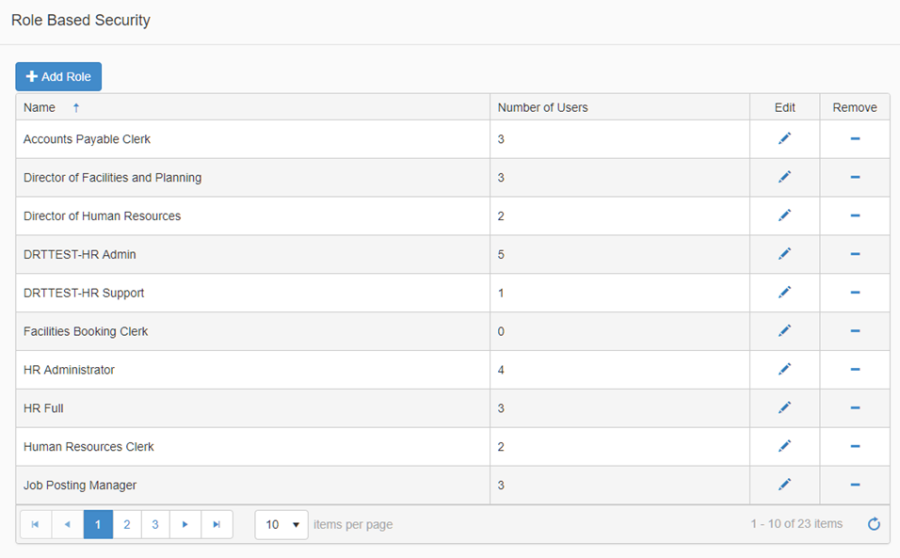
Navigate to Role Based Security, the Roles List page displays a listing of all roles that have been created within the district. Select an existing role to update or click Add Role to create a new role. For this document a new Role will be created.
-
Click Add Role, and a window will popup where you can add the role name (i.e. Accounts Payable Clerk)
-
Click Save
-
Click Close
-
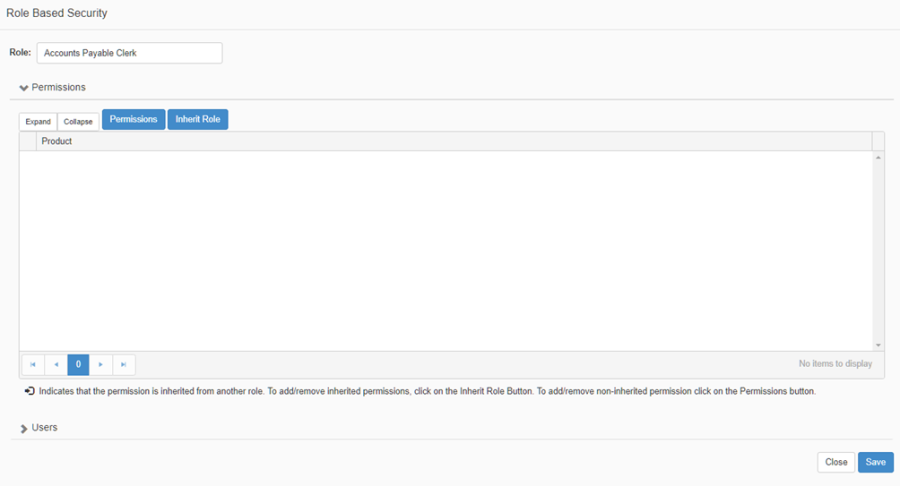
Locate the new Role in the list and click the Edit pencil
-
-
On the Role page you may inherit permissions from existing roles, or you can simply add permissions. This example will show the Add Permission to a Role functionality.
-
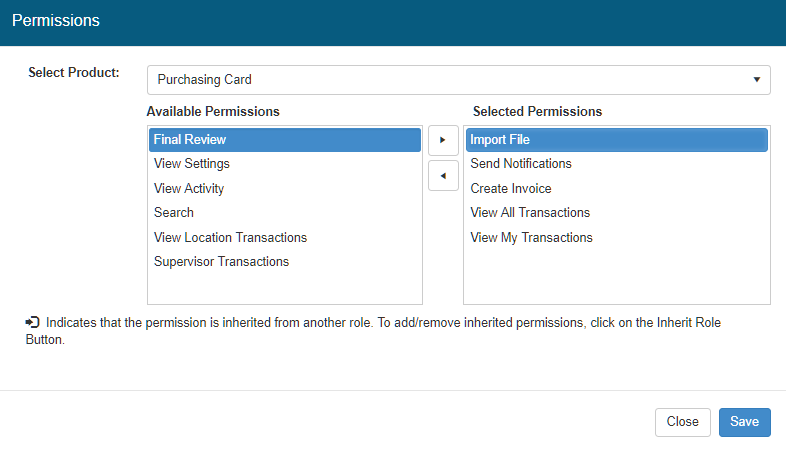
Click the Permissions button, and a window will popup where you can select the permissions to add to the role
-
Select Purchasing Card from the product list, and the list of available permissions will display in the list mover
-
Ctrl+click to multi-select, or single click to select a permission and then click the right arrow
-
Once you are satisfied with your selection, click Save
-
Click Close
-
-
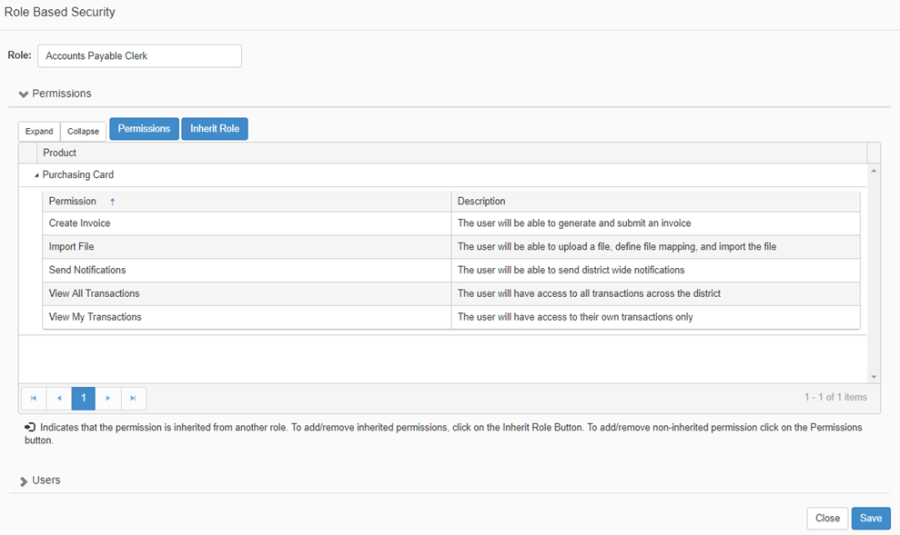
The Role will be updated to include the permissions selected for Purchasing Card
-
You can assign users to this Role by clicking on the Users section near the bottom of the page
-
Search for an employee, using the employee quick search
-
Click Add, and the employee will be added to the Role
Once the Role(s) and permissions have been created/updated and assigned to the appropriate users, you are ready to start using the new Purchasing Card feature.
-
