
You may import a Purchasing Card Statement that has been saved to either.CSV or.TXT format. The following fields may be included in the import file: GL Account, Transaction Date, Transaction Amount, GST Amount, Vendor Name, Card Number, Cardholder Name, Purchase Description. The Upload File page is controlled by your Role permissions.
Below is an example of a properly formed import file. Things to note:
-
There must be a header row
-
Header row values may not contain spaces (i.e. 'CardNumber' not 'Card Number')

If you receive an error when importing, see the troubleshooting section below for tips on how to format the data before import.
-
Click Upload File in the left-navigation menu
-
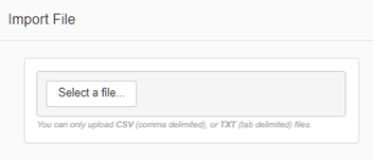
Click Select a file and then choose the .CSV or .TXT file to import
-
Click Continue, and the Import Mapping page will display. When the file loads it goes through basic validations and if there are any errors when parsing the file an error message is displayed
-
If a mapping template exists, then it will be automatically selected. Note that you can define multiple import templates, as needed. To Add, Edit, Delete, or Save a mapping template, click on the appropriate option in the button bar
-
If it is the first import, you will need to create a mapping template.
-
To Add, Edit, Delete, or Save a mapping template, click on the appropriate option in the button bar
-
To map a purchasing card field to the imported file, drag and then drop the field from the map table to the desired column in the imported file table (mapped columns will display in the top grid, and the column headers will be highlighted in the bottom grid). Note that the entire contents of the file can be viewed in the bottom grid on the page prior to importing.
.png?cb=41f1d191ccc7841706ba372975ec7791)
-
Once satisfied with the imported file and mapping the you have defined provide a Mapping name and click on Save to save the new template.
-
After saving the new import mapping template or selecting an existing template you want to use, click Continue. The system will perform additional validations on the file as follows:
-
Vendor Validations
-
Employee Validations
-
General Ledger Account Validations
-
-
Note that all errors must be resolved before the file can be successfully imported. If you selected the wrong file to import or received error messages and need to adjust the contents of the file, click Change File, and you will be prompted to select a new/or modified file to import.
-
When no errors exist, Click Continue, to complete the process. The time to import the file will vary based on the size and contents of the file, typically several seconds to a couple of minutes to complete. Once the contents of the file are imported the Transactions page will display.
Tips for updating a .csv file in Excel before importing
If you open a.csv file in Excel the traditional way i.e. double click or file/open, Excel automatically trims leading zeroes off numeric fields or performs other reformatting (i.e. scientific notation). This will cause issues with at least the General Ledger and the Card Holder Number, and possibly other numeric fields.
Example GL:00000711000001 – Opening the file in Excel the traditional way trims the leading zeroes, example GL: 711000001.
Example Card Holder Number will display in scientific notation: Opening this file the traditional way re-formats the card holder number to look like this – 4.171516E+15
To avoid this issue, do the following:
-
Open Excel, and select a blank workbook
-
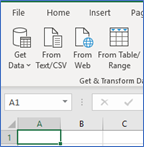
Click the Data tab
-
Click "From Text/CSV"
-
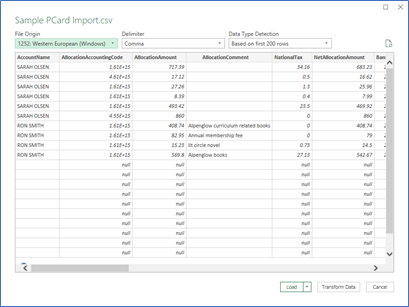
Browse for and Select the file and then click "Import"
-
In the Preview window click "Transform Data"
-
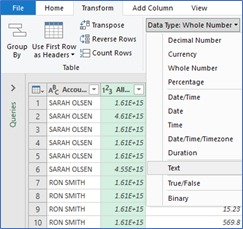
Highlight the GL column and then click the Transform tab
-
Then select the data type "Text"
-
Repeat this process for any columns where the data is not correctly displayed (if you see scientific notation for example, where you expect to see a numeric value or a GL with leading zeros trimmed). Most commonly, if the file is saved incorrectly and opened/updated in Excel the General Ledger and Card Holder Number fields would be affected.
-
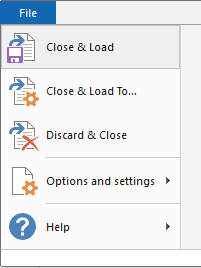
When all affected columns are updated click "File" and select "Close & Load"
-
In Excel, choose Save as to save the updated file to a new name – be sure to save as a.csv or.txt file (i.e. MyNewFile.csv)
-
Import into Purchasing Card
Additional Note: The import does not accept the 'hyphen' character. If your import file includes hyphens in the GL or and dates, it will need to be removed. i.e. GL 000-000-211-000-001 should be 000000211000001 or Date 2019-05-14 should be 20190514
Additional Note: The import requires a header row and the column header values cannot contain spaces. For example: GL Account will need to be GLAccount, Transaction Date will need to be TransactionDate, etc.
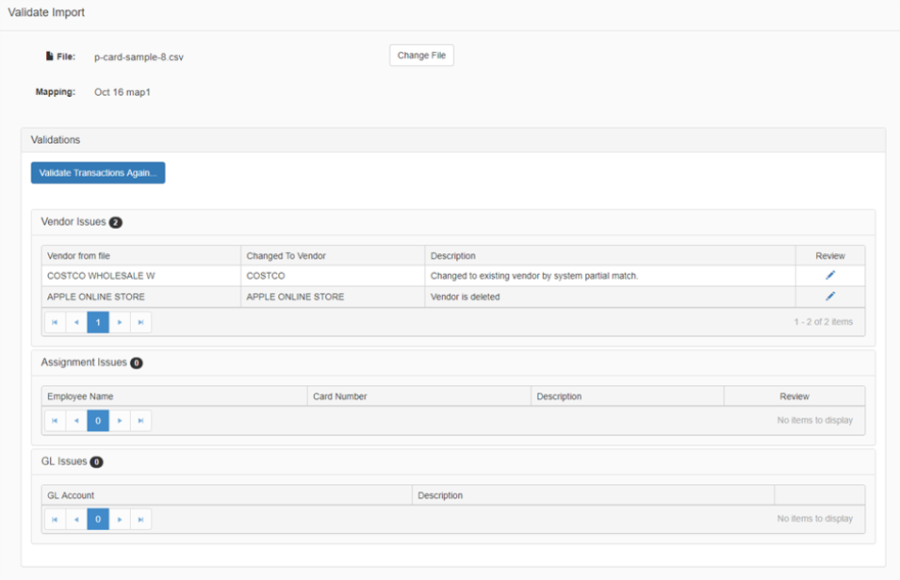
Vendor Validations
The system will check that the vendor names in the imported file exist and are active in the current vendor database. If a vendor name does not exist or has been deleted an error message will be displayed in the Vendor Issues grid.
Note:Vendor Validation can be controlled in the Purchasing Card Settings. By default, Vendor Validation is turned on but optionally you can choose to turn this validation off.
-
To correct vendor issues, click on the Review icon (pencil) in the corresponding row.
-
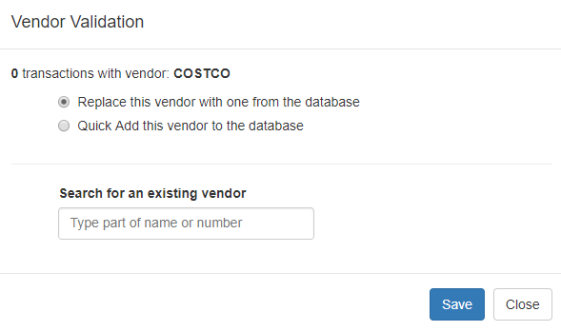
The Vendor Validation dialog box will display. There are two choices, you can either replace the vendor with one from the existing database, or you can add a new vendor to the database.
-
Option 1 - Replace Vendor: select the option 'Replace this vendor with one from the database' and a quick search field is displayed, simply start typing a portion of the vendor name that you want to use. The values that display in the drop-down list will be filtered based on the characters entered. Once you have selected the vendor to use for the transactions, click Save. Otherwise click Cancel to disregard any changes and close the dialog box.
-
The 'Changed To Vendor' field will update in the grid, to display the selected vendor to replace with, as well as a visual indicator (red triangle located at the top right of the Vendor name cell in the grid) for quick reference of what has changed.
-
Note that if there are multiple transactions tied to a vendor that does not exist in the database, you can update them all at one time rather than doing them one at a time.
-
Option 2 - Quick Add Vendor: If a vendor does not exist in the vendor database and there is not an appropriate existing vendor to replace with then you can add a new vendor.
-
Select the option 'Quick Add this vendor to the database. Enter a vendor number and a vendor name and click Save (must be unique or an error message will display). Otherwise click Cancel to disregard any changes and close the dialog box.
-
The 'Changed To Vendor' field will update in the grid, to display the newly added vendor to replace with, as well as a visual indicator (red triangle located at the top right of the Vendor name cell in the grid) for quick reference of what has changed.
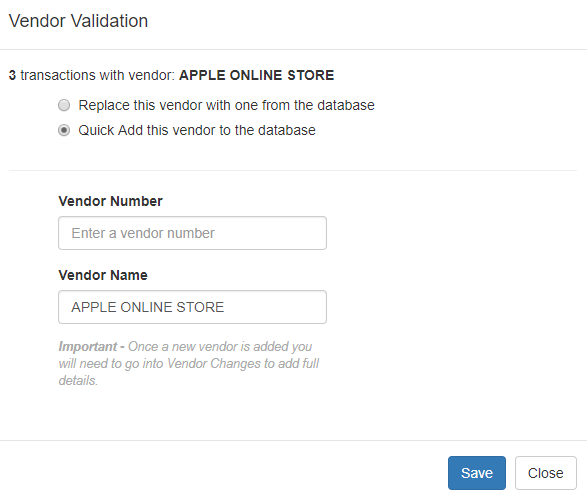
IMPORTANT:Once a new vendor is added, you will need to enter the full vendor details in 'Vendor Changes'
-
Click the 'Validate Transactions Again' button to re-validate the file. Corrected issues will no longer display in the grid. If no issues exist with Vendors, Employees, or GL Accounts you will be able to continue with the import process. If errors exist, they will need to be fixed before you can continue.
Employee Validations
The system will check if the PCard assignments are valid. If the combination of employee name and card number does not exist in the Purchasing Card Assignments (defined on the Settings page, refer to the Settings section below in this document for more details) then an error message will display.

-
To current employee purchasing card assignment issues click on the pencil icon in the Review column
-
You will be redirected to the Settings page where you can search for the employee's location and then add or modify their purchasing card assignment record (refer to Settings section below for more information)
-
Once you have corrected or added the assignment then click Upload in the left navigation bar, and then click Continue, and the Validations page will display
-
Click the 'Validate Transactions Again' button to re-validate the file. Corrected issues will no longer display in the grid. If no issues exist with Vendors, Employees, or GL Accounts you will be able to continue with the import process. If errors exist, they will need to be corrected before you can continue.
General Ledger Account Validations
The system will check if the GL Accounts are valid for the current year; if invalid an error will display. GL account errors must be resolved before importing the file. Edit the transaction file, correct the invalid GL accounts and then import the file again.
Note: GL Validation is controlled in the Purchasing Card Settings. By default, the import looks for a GL entry for each transaction in the uploaded statement file. Optionally, you can choose to have the system ignore the GL in the uploaded file and use the default GL that has been defined for each cardholder in Purchasing Card Assignment Settings.
