
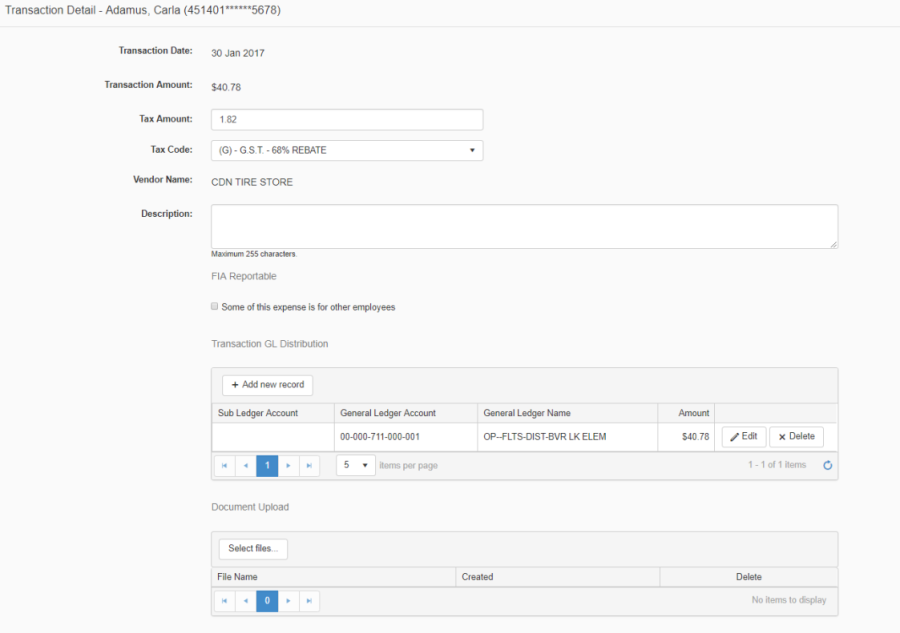
To view or enter additional details about a transaction, click on the Transaction Date hyperlink and the Transaction Detail page will display.
-
The Transaction date, amount, and vendor name display, read-only
-
The tax displays and can be modified if applicable
-
The employee may enter additional information about the transaction in the description field
-
FIA Reportable (Freedom of Information Act) - If any portion of the expense is for other employees, click the check box and then click Add New Record in the grid. Enter the employee name(s) and the expense amount(s).
-
A transaction may be distributed to multiple GL's. Click add new record to split the GL amount. Refer to GL Search section below in this document for more details.
-
Documents (i.e. a receipt, or approval letter) may be uploaded, on either the Summary page or the Detail page. Refer to the Document Upload section below in this document for more details.
-
Click Next or Previous to navigate to additional transaction records
-
Click Close to return to the Summary Transaction page.
-
Click Submit for Supervisor Review, the Transaction Summary grid will be updated with a visual indicator (check mark) that indicates that the employee has reviewed the transaction record.
FIA Reportable
When adding a record to the FIA reportable grid, note that when doing a name search you will be able to see the employee name, employee number and the type code. If the logged in user is a district Final Reviewer, then they will also see the address information.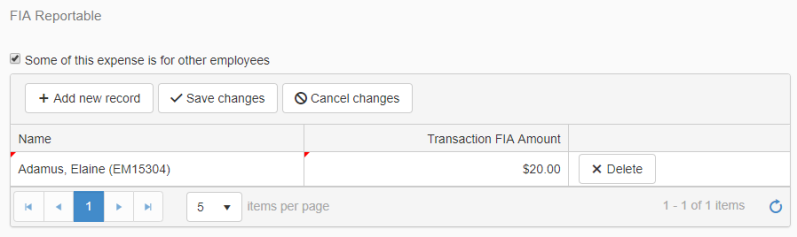
-
Once the record is saved the Summary grid for that transaction is updated with a visual indicator that it is FIA reportable.

GL Search
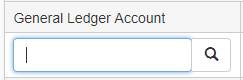
In the GL field in the entry grid you may type the GL directly, or if you are not sure, click on the magnifying glass to search for a GL
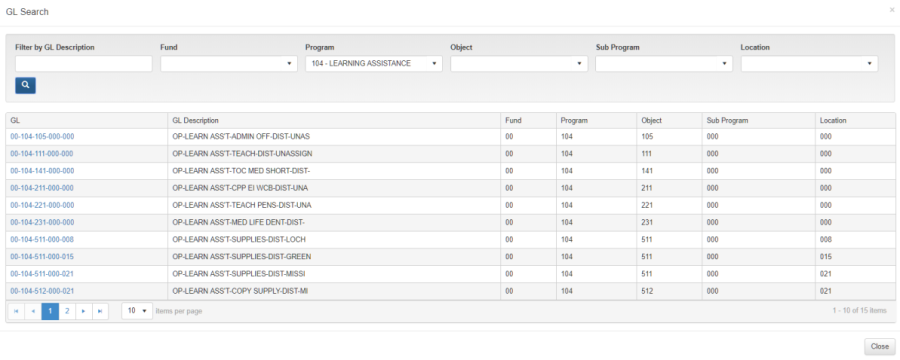
When the search opens you are presented with several search filters (the filters that display is dependent on your districts setup).

In this example, you may filter the list of GLs' by:
-
GL Description
-
Fund
-
Program
-
Object
-
Sub Program
-
Location
Enter or select a value and then click the search icon, and the results of the search are displayed. Click on a GL link to select it and the search window will close, and the grid row will be updated with your selection.
Document Upload

-
To attach one or more receipts or other document to a purchasing card transaction, click the Select Files button.
-
Browse, and select the file that you want to upload
-
Once selected the file displays in the grid; click on the document name link to view or download the file; click the minus sign icon to remove the uploaded file

-
A visual indicator displays on the Transaction Summary page to indicate that a document has been added. Click on the attachment icon in the summary grid to view/download/remove a document attachment